Lincoln Aviator: Climate Control System - General Information / General Procedures - Air Conditioning (A/C) System Recovery, Evacuation and Charging - Vehicles With: R134A Refrigerant
Special Tool(s) / General Equipment
| Air Conditioning Service Unit | |
| Refrigerant Identification Equipment |
Recovery
NOTICE: Use an A/C refrigerant analyzer before recovering any of the vehicle's A/C refrigerant. Failure to do so puts the shop's bulk refrigerant at risk of contamination. If the vehicle's A/C refrigerant is contaminated, refer the customer to the service facility that carried out the last A/C service. If the customer wishes to pay the additional cost, use the A/C recovery equipment that is designated for recovering contaminated A/C refrigerant. Dispose of all contaminated A/C refrigerant as hazardous waste in accordance with all federal, state and local regulations. For all equipment, follow the manufacturer's instructions.
-
NOTE: Use only Ford Approved R134A refrigerant management equipment.
Verify the refrigerant purity prior to recovery. Refer to Refrigerant Identification Testing procedure in Group 412.
-
198-RI2012yfp A/C Refrigerant Analyzer for use with R134a and R1234yf vehicles
Use the General Equipment: Refrigerant Identification Equipment
-
198-RI2012yfp A/C Refrigerant Analyzer for use with R134a and R1234yf vehicles
-
Connect the tool to the low-side and high-side service
gauge port valves following the manufacturer's instructions.
-
265-37887 Ritchie R134A A/C Refrigerant Hybrid Management System
Use the General Equipment: Air Conditioning Service Unit
-
265-37887 Ritchie R134A A/C Refrigerant Hybrid Management System
-
NOTE: Never attempt to recover from only the low side service gauge port valve (solenoid valves in the system will not allow for full recovery).
Recover the refrigerant from the system following the manufacturer's instructions. Note the amount of oil removed during the refrigerant recovery (if any). Add that same amount back into the system once repairs are complete. Refer to the appropriate Refrigerant Oil Adding procedure in Group 412.
-
Allow the system to set for about 2 minutes and observe
the system vacuum reading. If the vacuum is not lost, disconnect the
recovery equipment.
-
If the system loses vacuum, repeat Steps 3 through 5 until the vacuum level remains stable for 2 minutes.
-
Carry out the required repairs.
Evacuation
-
NOTICE: Use an A/C refrigerant analyzer before recovering any of the vehicle's refrigerant. Failure to do so puts the shop's bulk refrigerant at risk of contamination. If the vehicle's A/C refrigerant is contaminated, refer the customer to the service facility that carried out the last A/C service. If the customer wishes to pay the additional cost, use the A/C recovery equipment that is designated for recovering contaminated A/C refrigerant. Dispose of all contaminated A/C refrigerant as hazardous waste in accordance with all federal, state and local regulations. For all equipment, follow the manufacturer's instructions.
-
198-RI2012yfp A/C Refrigerant Analyzer for use with R134a and R1234yf vehicles
Use the General Equipment: Refrigerant Identification Equipment
-
198-RI2012yfp A/C Refrigerant Analyzer for use with R134a and R1234yf vehicles
-
Connect the tool to the low-side and high-side service
gauge port valves following the manufacturer's instructions.
-
265-37887 Ritchie R134A A/C Refrigerant Hybrid Management System
Use the General Equipment: Air Conditioning Service Unit
-
265-37887 Ritchie R134A A/C Refrigerant Hybrid Management System
-
NOTE: Never attempt to recover from only the low side service gauge port valve (solenoid valves in the system will not allow for full recovery).
Evacuate the system until the low-pressure gauge reads at least 99.4 kPa (29.5 in-Hg) of vacuum and as close to 101.1 kPa (30 in-Hg) as possible. Continue to operate the vacuum pump for a minimum of 45 minutes.
-
Turn off the vacuum pump. Observe the low-pressure gauge for 10 minutes to make sure the system vacuum is held.
Charging
-
NOTICE: Use an A/C refrigerant analyzer before recovering any of the vehicle's refrigerant. Failure to do so puts the shop's bulk refrigerant at risk of contamination. If the vehicle's A/C refrigerant is contaminated, refer the customer to the service facility that carried out the last A/C service. If the customer wishes to pay the additional cost, use the A/C recovery equipment that is designated for recovering contaminated A/C refrigerant. Dispose of all contaminated A/C refrigerant as hazardous waste in accordance with all federal, state and local regulations. For all equipment, follow the manufacturer's instructions.
-
198-RI2012yfp A/C Refrigerant Analyzer for use with R134a and R1234yf vehicles
Use the General Equipment: Refrigerant Identification Equipment
-
198-RI2012yfp A/C Refrigerant Analyzer for use with R134a and R1234yf vehicles
-
Lubricate the refrigerant system with the correct amount
of clean PAG oil. Refer to the appropriate Refrigerant Oil Adding
procedure in Group 412.
-
Connect the tool to the low-side and high-side service
gauge port valves following the manufacturer's instructions.
-
265-37887 Ritchie R134A A/C Refrigerant Hybrid Management System
Use the General Equipment: Air Conditioning Service Unit
-
265-37887 Ritchie R134A A/C Refrigerant Hybrid Management System
-
Set the refrigerant charge amount and charge the refrigerant system following the manufacturer's instructions.
 General Procedures - Air Conditioning (A/C) System Recovery, Evacuation and Charging - Hybrid Electric Vehicle (HEV), Vehicles With: R134A Refrigerant
Special Tool(s) /
General Equipment
Air Conditioning Service Unit
Refrigerant Identification Equipment
Recovery
NOTICE:
Use an A/C refrigerant analyzer before recovering any of the vehicle's A/C refrigerant...
 General Procedures - Air Conditioning (A/C) System Recovery, Evacuation and Charging - Vehicles With: R1234YF Refrigerant
Special Tool(s) /
General Equipment
Air Conditioning Service Unit
Refrigerant Identification Equipment
Recovery
NOTICE:
Use an A/C refrigerant analyzer before recovering any of the vehicle's A/C refrigerant...
Other information:
Lincoln Aviator 2020-2026 Service Manual: Removal and Installation - Rear Wheelhouse Outer
Special Tool(s) / General Equipment Resistance Spotwelding Equipment Spherical Cutter Grinder Hot Air Gun Spatula Air Body Saw 8 mm Drill Bit MIG/MAG Welding Equipment Spot Weld Drill Bit Locking Pliers Materials Name Specification Metal Bonding AdhesiveTA-1, TA-1-B, 3M™ 08115, LORD Fusor® 108B - Seam SealerTA-2-B, 3M™ 08308, LORD Fusor® 803DTM - Flexible Foam Repair3M™ 08463, LORD Fusor® 121 - Removal WARNING: Electric vehicles damaged by a crash may have compromised high voltage safety systems and present a potential high voltage electrical shock hazard...
Lincoln Aviator 2020-2026 Service Manual: Description and Operation - Perimeter Anti-Theft Alarm - Overview
Overview The perimeter anti-theft alarm system has three operation modes: ARMED - The perimeter anti-theft alarm is armed when the ignition is OFF and all vehicle entry points have been electrically locked for 20 seconds. ACTIVE - When the perimeter anti-theft alarm activates, the horn sounds and all turn signals and interior courtesy lamps flash...
Categories
- Manuals Home
- Lincoln Aviator Owners Manual
- Lincoln Aviator Service Manual
- USB Port and Power Point Locations
- Changing the Front Wiper Blades - Vehicles With: Heated Wiper Blades
- Resetting the System
- New on site
- Most important about car
Fastening the Seatbelts
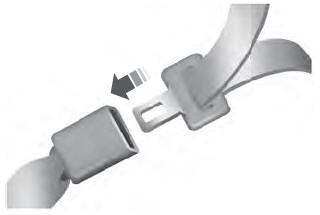
The front outboard and rear safety restraints in the vehicle are combination lap and shoulder belts.
Insert the belt tongue into the proper buckle (the buckle closest to the direction the tongue is coming from) until you hear a snap and feel it latch. Make sure that you securely fasten the tongue in the buckle.