
Lincoln Aviator: Instrumentation, Message Center and Warning Chimes / General Procedures - Seatbelt Minder Deactivating/Activating
Activation
.jpg) WARNING:
Before beginning any service procedure in this section,
refer to Safety Warnings in section 100-00 General Information. Failure
to follow this instruction may result in serious personal injury.
WARNING:
Before beginning any service procedure in this section,
refer to Safety Warnings in section 100-00 General Information. Failure
to follow this instruction may result in serious personal injury.
NOTE: The driver and passenger seat Belt-Minder® deactivating/activating can be carried out using the scan tool.
NOTE: If you are using a MyKey® programmed key, the Belt-Minder® cannot be disabled and does not time out after 5 minutes. If the Belt-Minder® has been previously disabled, it is re-enabled when a MyKey® programmed key is used.
NOTE: The driver and front passenger Belt-Minder® are deactivated/activated independently. When deactivating/activating one seating position, do not buckle the other position.
NOTE: Clear any message center warnings that are present before and throughout the procedure.
-
Apply the parking brake before deactivating/activating the Belt-Minder®.
-
Place the selector lever in PARK (P).
-
Place the ignition in OFF.
-
Close all vehicle doors, hood and liftgate.
-
Unbuckle the driver and the front passenger seatbelts.
-
Place the ignition in the RUN mode (do not start the engine).
-
Wait until the seatbelt warning indicator turns off (approximately 1 minute).
-
NOTE: This step must be completed within 30 seconds after the seatbelt warning indicator turns off (step 6).
Wait 5 seconds after the seatbelt warning indicator turns off, then for the seating position to be disabled, buckle then unbuckle the seatbelt 3 times at a moderate speed, ending with the seatbelt in the unbuckled state. After this step the seatbelt warning indicator illuminates.
-
NOTE: Clear any message center warnings that are present before and throughout the procedure.
NOTE: As confirmation of disabling the Belt-Minder® (if currently enabled), the seatbelt warning indicator flashes 4 times per second for 3 seconds.
NOTE: As confirmation of enabling the Belt-Minder® (if currently disabled), the seatbelt warning indicator flashes 4 times per second for 3 seconds, followed by 3 seconds with the seatbelt warning indicator off, followed by another flash sequence of 4 times per second for 3 seconds.
While the seatbelt warning indicator is still on, buckle then unbuckle the seatbelt one time at a moderate speed.
-
After confirmation, the deactivation/activation procedure is complete.
 Diagnosis and Testing - Instrumentation, Message Center and Warning Chimes - Vehicles With: Head Up Display (HUD)
Diagnostic Trouble Code (DTC) Chart
Diagnostics in this manual assume a certain skill level and knowledge of Ford-specific diagnostic practices. REFER to: Diagnostic Methods (100-00 General Information, Description and Operation)...
 Removal and Installation - Instrument Panel Cluster (IPC)
Special Tool(s) /
General Equipment
Interior Trim Remover
Removal
NOTE:
Removal steps in this procedure may contain installation details...
Other information:
Lincoln Aviator 2020-2026 Service Manual: Removal and Installation - Head Up Display (HUD) Module
Removal NOTE: Removal steps in this procedure may contain installation details. Remove the instrument panel upper section. Refer to: Instrument Panel Upper Section (501-12 Instrument Panel and Console, Removal and Installation). Remove the bolts and position out the IPC...
Lincoln Aviator 2020-2026 Service Manual: Description and Operation - A Clutch
Overview Item Description 1 SSA 2 A clutch control valve 3 A clutch latch valve 4 A clutch apply circuit 5 A clutch piston 6 A clutch assembly 7 Ring gear No...
Categories
- Manuals Home
- Lincoln Aviator Owners Manual
- Lincoln Aviator Service Manual
- Tire Change Procedure
- Interior Lamps
- Changing the Front Wiper Blades - Vehicles With: Heated Wiper Blades
- New on site
- Most important about car
Child Safety Locks
When the child safety locks are set, you cannot open the rear doors from the inside.
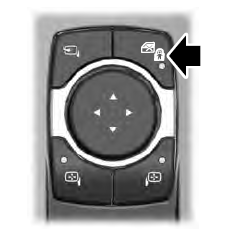
The child safety lock control is on the driver door.
Press the control to switch the child safety locks on. Press the control again to switch them off. A light on the child safety control illuminates when you switch them on.
