Lincoln Aviator: Multifunction Electronic Modules / General Procedures - Transport Mode Deactivation
Deactivation
NOTE: After vehicle build, some vehicle modules are set in Transport mode including the IPC and the BCM. Transport mode reduces battery drain during longer periods where the vehicle is not used. While in transport mode, the IPC displays TRANSPORT MODE CONTACT DEALER in the message center. Various systems may be altered or are disabled when in the transport mode. The vehicle automatically reverts to normal operation mode after being driven 201 km (125 mi). The vehicle can be manually taken out of Transport mode using this procedure.
If the IPC displays FACTORY MODE CONTACT DEALER in the message center the vehicle is set in factory mode. The system does not automatically revert to another mode and must be manually set to either the transport or normal operation mode. Refer to the Factory Mode Deactivation procedure in this section.-
Place the ignition in the OFF position..jpg) WARNING:
Before beginning any service procedure in this
section, refer to Safety Warnings in section 100-00 General Information.
Failure to follow this instruction may result in serious personal
injury.
WARNING:
Before beginning any service procedure in this
section, refer to Safety Warnings in section 100-00 General Information.
Failure to follow this instruction may result in serious personal
injury.
-
Verify the battery is fully charged.
Refer to: Battery Charging (414-01 Battery, Mounting and Cables, General Procedures).
-
Place the ignition in the ON position.
-
NOTE: Steps 4 and 5 must be carried out within 10 seconds.
Press and release the brake pedal 5 times.
-
NOTE: The IPC message center indicates NORMAL MODE when the procedure has been successfully completed.
Press and release the hazard switch 2 times.
-
Start the engine.
-
Place the ignition in the OFF position.
-
Verify the RKE works correctly.
 General Procedures - Factory Mode Deactivation
Deactivation
NOTE:
During vehicle build, some modules, such as the IPC and BCM module are set in factory mode.
Factory mode reduces the drain on the battery during longer periods
where the vehicle is not used...
 Removal and Installation - Body Control Module (BCM)
Removal
NOTE:
Removal steps in this procedure may contain installation details.
If installing a new BCM, connect a battery charger to the battery to make sure it is charged to maintain proper battery voltage...
Other information:
Lincoln Aviator 2020-2026 Owners Manual: Engine Oil Check
Engine Oil Dipstick Engine Oil Check To check the engine oil level consistently and accurately, do the following: Make sure the parking brake is on. Make sure the transmission is in park (P) or neutral (N). Run the engine until it reaches normal operating temperature...
Lincoln Aviator 2020-2026 Service Manual: Removal and Installation - Camshaft RH
Special Tool(s) / General Equipment 303-1633Remover, Roller Rocker FollowerTKIT-2014D-ROW3TKIT-2014D-FL_ROW Materials Name Specification Flange SealantCU7Z-19B508-A WSS-M2G348-A11 Removal NOTICE: During engine repair procedures, cleanliness is extremely important...
Categories
- Manuals Home
- Lincoln Aviator Owners Manual
- Lincoln Aviator Service Manual
- Resetting the System
- Drive Modes
- Disabling Auto-Start-Stop
- New on site
- Most important about car
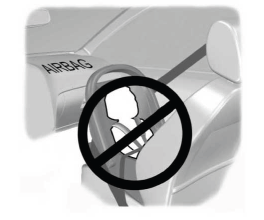
Children and Airbags
WARNING: Airbags can kill or injure a child in a child restraint. Never place a rear-facing child restraint in front of an active airbag. If you must use a forward-facing child restraint in the front seat, move the seat upon which the child restraint is installed all the way back.