Lincoln Aviator: Rear View Mirrors / General Procedures - Power Mirrors Synchronization
Synchronization
NOTE: The power folding mirrors may need to be synchronized any time the mirrors are folded or unfolded without using the folding switch, or if a new power folding mirror is installed.
NOTE: The power telescoping mirrors may need to be synchronized any time the mirrors are extended or retracted without using the telescoping switch, or if a new power telescoping mirror is installed.
NOTE: If the power folding or power telescoping mirrors are continuously electronically moved, the power lockout feature disables the system for approximately 3-10 minutes to prevent damage to the power fold or power telescope motors. After 3-10 minutes have elapsed, normal operation resumes.
NOTE: The truck power folding mirror procedure is shown in the videos; other vehicles and power telescoping mirror procedure are similar.
-
Fold or retract both mirrors by hand.
-
Using the power folding/power telescoping mirror switch, operate the mirrors until an audible click is heard.
-
Operate the power folding or power telescoping mirrors an additional 3 to 4 times to synchronize the mirrors.
-
For vehicles equipped with the mirror control switch
integral to the window switch, refer to the video below.
Click here to view a video version of this procedure.
.png)
-
For vehicles equipped with the stand alone mirror control switch, refer to the video below.
Click here to view a video version of this procedure.
.png)
 Diagnosis and Testing - Rear View Mirrors
DTC Chart: DDM
Diagnostics in this manual assume a certain skill level and knowledge of Ford-specific diagnostic practices. REFER to: Diagnostic Methods (100-00 General Information, Description and Operation)...
 Removal and Installation - Exterior Mirror
Special Tool(s) /
General Equipment
Flat Headed Screw Driver
Removal
NOTE:
Removal steps in this procedure may contain installation details...
Other information:
Lincoln Aviator 2020-2026 Service Manual: Description and Operation - Warning Chimes - System Operation and Component Description
System Operation System Diagram Item Description 1 ABS module 2 PAM 3 Door ajar switches 4 Driver seatbelt buckle 5 Passenger seatbelt buckle 6 RCM 7 PCM 8 GWM 9 SCCM 10 ACM 11 Rear speakers 12 Front speakers 13 BCM 14 IPMA 15 SODR 16 SODL 17 Base audio system 18 Audio DSP module 19 Rear speakers 20 Front speakers 21 Mid- and high-level 14- and 28-speaker audio systems 22 DSM 23 RGTM 24 IPMB 25 GSM 26 IPC chime arbitrator 27 IPC 28 Turn signal on tick-Tock tone 29 Belt-Minder® chime 30 Door ajar chime 31 Headlamps on chime 32 Parking brake chime 33 Seatbelt chime 34 Airbag secondary chime 35 Message center chime 36 Parking aid chime 37 Ignition/engine on chime 38 Perimeter alarm chime 39 Turn signal left on chime 40 Active park assist chime 41 BLIS/ CTA chime 42 Forward collision warning chime 43 Lane keeping aid warning chime 44 Transmission not in park chime 45 Backup chime (except North America) 46 Home safe light chime 47 Memory feedback chime 48 Power liftgate chime 49 Service AdvanceTrac chime 50 Electric Vehicle (EV) engine on chime 51 Adaptive cruise control warning chime 52 Electronic latch system Llock and unlock chime 53 Key-in-ignition warning chime 54 Fuel door release chime Network Message Chart Module Network Input Messages - IPC Broadcast Message Originating Module Message Purpose Accessory delay BCM Input used to control the overall chime function...
Lincoln Aviator 2020-2026 Service Manual: Diagnosis and Testing - Pedestrian Alert System
Diagnostic Trouble Code (DTC) Chart Diagnostics in this manual assume a certain skill level and knowledge of Ford-specific diagnostic practices. REFER to: Diagnostic Methods (100-00 General Information, Description and Operation). Diagnostic Trouble Code Chart Module DTC Description Action PACM B1A01:01 Speaker #1: General Electrical Failure GO to Pinpoint Test C PACM B1A01:11 Speaker #1: Circuit Short To Ground GO to Pinpoint Test C PACM B1A01:12 Speaker #1: Circuit Short To Battery GO to Pinpoint Test D PACM B1A01:13 Speaker #1: Circuit Open GO to Pinpoint Test D PACM B1A02:01 Speaker #2: General Electrical Failure GO to Pinpoint Test C PACM B1A02:11 Speaker #2: Circuit Short To Ground GO to Pinpoint Test C PACM B1A02:12 Speaker #2: Circuit Short To Battery GO to Pinpoint Test D PACM B1A02:13 Speaker #2: Circuit Open GO to Pinpoint Test D PACM U0100:00 Lost Communication With ECM/PCM "A": No Sub Type Information GO to Pinpoint Test E PACM U0140:00 Lost Communication With Body Control Module: No Sub Type Information GO to Pinpoint Test F PACM U0422:00 Invalid Data Received From Body Control Module: No Sub Type Information GO to Pinpoint Test G PACM U201A:51 Control Module Main Calibration Data: Not Programmed GO to Pinpoint Test H PACM U2101:00 Control Module Configuration Incompatible: No Sub Type Information GO to Pinpoint Test H PACM U3000:41 Control Module: General Checksum Failure GO to Pinpoint Test I PACM U3000:42 Control Module: General Memory Failure GO to Pinpoint Test I PACM U3000:96 Control Module: Component Internal Failure GO to Pinpoint Test I PACM U3003:16 Battery Voltage: Circuit Voltage Below Threshold GO to Pinpoint Test J PACM U3003:17 Battery Voltage: Circuit Voltage Above Threshold GO to Pinpoint Test K Symptom Chart Diagnostics in this manual assume a certain skill level and knowledge of Ford-specific diagnostic practices...
Categories
- Manuals Home
- Lincoln Aviator Owners Manual
- Lincoln Aviator Service Manual
- USB Port and Power Point Locations
- Description and Operation - Body and Frame
- Resetting the System
- New on site
- Most important about car
Remote Control
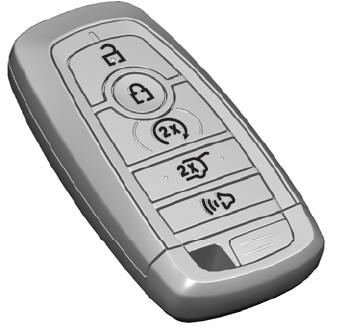
Passive Key

The passive key operates the power locks and the remote start system. The passive key must be in your vehicle to use the push button start.
Note: You may not be able to shift out of park (P) unless the passive key is inside your vehicle.
