Lincoln Aviator 2020-2026 Service Manual / Electrical / Lighting / Exterior Lighting / Removal and Installation - Headlamp Control Module (HCM)
Lincoln Aviator: Exterior Lighting / Removal and Installation - Headlamp Control Module (HCM)
Removal
-
NOTE: This step is only necessary if the HCM is being replaced.
NOTE: If installing a new module, it is necessary to upload the module configuration information to the scan tool prior to removing the module. This information must be downloaded into the new module after installation.
NOTE: If the HCM did not respond to the diagnostic scan tool, As-Built Data may need to be entered as part of the repair.
Using a diagnostic scan tool, begin the PMI process for the HCM following the on-screen instructions.
Refer to: Module Configuration - System Operation and Component Description (418-01 Module Configuration, Description and Operation).
-
Position back the front carpet.
.jpg) |
-
Disconnect the electrical connector, remove the screws and the HCM.
Torque: 28 lb.in (3.2 Nm)
.jpg) |
Installation
-
To install, reverse the removal procedure.
-
Using a diagnostic scan tool, complete the PMI process for the HCM following the on-screen instructions.
Refer to: Module Configuration - System Operation and Component Description (418-01 Module Configuration, Description and Operation).
 Removal and Installation - Headlamp Assembly
Removal
NOTE:
Removal steps in this procedure may contain installation details.
NOTE:
LH side shown, RH side similar.
Remove the front bumper cover...
 Removal and Installation - Headlamp Leveling Sensor
Removal
NOTE:
Removal steps in this procedure may contain installation details.
Front suspension mounted
Remove the LH front wheel and tire assembly...
Other information:
Lincoln Aviator 2020-2026 Owners Manual: Using Active Park Assist
The parking button is above the transmission selector, just below the display screen. Press the parking button then touch the Active Park Assist icon on the display screen to bring up full screen notifications. Touch the soft keys on the display screen to switch between Parallel Park In, Perpendicular Park In or Parallel Park Out parking modes...
Lincoln Aviator 2020-2026 Owners Manual: Cleaning the Interior
WARNING: Do not use cleaning solvents, bleach or dye on the vehicle's seatbelts, as these actions may weaken the belt webbing. WARNING: On vehicles equipped with seat-mounted airbags, do not use chemical solvents or strong detergents. Such products could contaminate the side airbag system and affect performance of the side airbag in a crash...
Categories
- Manuals Home
- Lincoln Aviator Owners Manual
- Lincoln Aviator Service Manual
- Child Safety Locks
- Remove and Reinstall the Battery
- Drive Modes
- New on site
- Most important about car
Locking and Unlocking the Doors from Inside

Locking the Doors
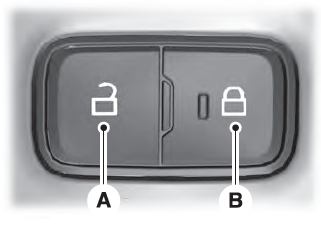
Press the lock switch on the door interior trim panel. The doors can no longer be released using the exterior door handle switches and the luggage compartment locks.
Copyright © 2026 www.liaviator2.com
