
Lincoln Aviator 2020-2026 Service Manual / Body and Paint / Body and Paint / Glass, Frames and Mechanisms / Removal and Installation - Rear Door Window Control Switch
Lincoln Aviator: Glass, Frames and Mechanisms / Removal and Installation - Rear Door Window Control Switch
Special Tool(s) / General Equipment
| Interior Trim Remover |
Removal
NOTE: LH (left-hand) side shown, RH (right-hand) side similar.
-
Remove the rear door window control switch bezel assembly.
-
Release the locking tabs from the rear door window control switch bezel assembly.
Use the General Equipment: Interior Trim Remover
-
Disconnect the rear door window control switch electrical connector.
-
Disconnect the rear door lock control switch
electrical connector and remove the rear door window control switch
bezel assembly.
-
Release the locking tabs from the rear door window control switch bezel assembly.
.jpg) |
-
NOTE: This step is only necessary when installing a new component.
Remove the rear door window control switch from the bezel assembly.
-
Release the locking tabs from the rear door window control switch.
-
Remove the rear door window control switch from the bezel assembly.
-
Release the locking tabs from the rear door window control switch.
.jpg) |
Installation
-
To install, reverse the removal procedure.
 Removal and Installation - Rear Door Glass Top Run
Removal
NOTE:
LH (left-hand) side shown, RH (right-hand) side similar.
NOTE:
Removal steps in this procedure may contain installation details.
Remove the rear door window regulator and motor...
 Removal and Installation - Rear Door Window Glass
Removal
NOTE:
LH (left-hand) side shown, RH (right-hand) side similar.
Remove the rear door window top run.
Refer to: Rear Door Glass Top Run (501-11 Glass, Frames and Mechanisms, Removal and Installation)...
Other information:
Lincoln Aviator 2020-2026 Owners Manual: Automatic High Beam Control Indicators. Overriding Automatic High Beam Control
Automatic High Beam Control Indicators The indicator illuminates to confirm when the system is ready to assist. Overriding Automatic High Beam Control WARNING: The system does not relieve you of your responsibility to drive with due care and attention...
Lincoln Aviator 2020-2026 Service Manual: Removal and Installation - Cabin Coolant Heater
Removal NOTE: Removal steps in this procedure may contain installation details. With the vehicle in NEUTRAL, position it on a hoist. Refer to: Jacking and Lifting (100-02 Jacking and Lifting, Description and Operation). Disconnect the batteries...
Categories
- Manuals Home
- Lincoln Aviator Owners Manual
- Lincoln Aviator Service Manual
- Description and Operation - Body and Frame
- Opening and Closing the Hood
- Disabling Auto-Start-Stop
- New on site
- Most important about car
Child Safety Locks
When the child safety locks are set, you cannot open the rear doors from the inside.
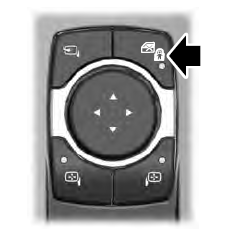
The child safety lock control is on the driver door.
Press the control to switch the child safety locks on. Press the control again to switch them off. A light on the child safety control illuminates when you switch them on.

Copyright © 2026 www.liaviator2.com