Lincoln Aviator: Seatbelt Systems / Removal and Installation - Seatbelt Shoulder Height Adjuster
Removal
NOTE: Removal steps in this procedure may contain installation details.
NOTE: Driver side shown, passenger side similar.
-
Remove the upper B-pillar trim panel.
Refer to: B-Pillar Trim Panel (501-05 Interior Trim and Ornamentation, Removal and Installation).
-
Remove the D-ring bolt and position the front seatbelt aside.
Torque: 30 lb.ft (40 Nm)
.jpg) |
-
NOTE: This step is only necessary when installing a new component.
NOTE: The spacer is part of the seatbelt shoulder height adjuster.
Remove and discard the spacer from the front seatbelt retractor and pretensioner D-ring bolt.
.jpg) |
-
Position the seatbelt shoulder height adjuster.
-
Remove the bolt.
Torque: 30 lb.ft (40 Nm)
-
NOTE: For passenger side, rotate the height adjuster 90 degrees counter-clockwise.
Rotate the height adjuster 90 degrees clockwise.
-
Remove the bolt.
.jpg) |
-
Remove the seatbelt shoulder height adjuster.
.jpg) |
Installation
NOTE: During installation, make sure the seatbelt webbing is not twisted and the seatbelts and buckles are accessible to the occupants.
-
To install, reverse the removal procedure.
-
Check the seatbelt system for correct operation.
Refer to: Seatbelt Systems (501-20A Seatbelt Systems, Diagnosis and Testing).
 Removal and Installation - Front Seatbelt Retractor and Pretensioner
Removal
WARNING:
The following procedure prescribes critical repair steps
required for correct restraint system operation during a crash. Follow
all notes and steps carefully...
 Removal and Installation - Second Row Center Seatbelt Buckle
Removal
NOTE:
Removal steps in this procedure may contain installation details.
Remove the second row center seat.
Refer to: Second Row Center Seat (501-10B Second Row Seats, Removal and Installation)...
Other information:
Lincoln Aviator 2020-2026 Service Manual: Description and Operation - Engine Component View
E..
Lincoln Aviator 2020-2026 Service Manual: Diagnosis and Testing - Instrumentation, Message Center and Warning Chimes - Vehicles With: Head Up Display (HUD)
Diagnostic Trouble Code (DTC) Chart Diagnostics in this manual assume a certain skill level and knowledge of Ford-specific diagnostic practices. REFER to: Diagnostic Methods (100-00 General Information, Description and Operation). Diagnostic Trouble Code Chart Module DTC Description Action HUD U0100:00 Lost Communication With ECM/PCM "A":No Sub Type Information GO to Pinpoint Test J HUD U0140:00 Lost Communication With Body Control Module:No Sub Type Information GO to Pinpoint Test K HUD U0164:00 Lost Communication With HVAC Control Module:No Sub Type Information GO to Pinpoint Test M HUD U0208:00 Lost Communication With "Seat Control Module A":No Sub Type Information GO to Pinpoint Test N HUD U0212:00 Lost Communication With Steering Column Control Module:No Sub Type Information GO to Pinpoint Test O HUD U0232:00 Lost Communication With Side Obstacle Detection Control Module "A":No Sub Type Information GO to Pinpoint Test P HUD U0233:00 Lost Communication With Side Obstacle Detection Control Module "B":No Sub Type Information GO to Pinpoint Test P HUD U0238:00 Lost Communication With Digital Audio Control Module "D":No Sub Type Information GO to Pinpoint Test Q HUD U023A:00 Lost Communication With Image Processing Module A:No Sub Type Information GO to Pinpoint Test R HUD U0401:00 Invalid Data Received from ECM/PCM A:No Sub Type Information GO to Pinpoint Test J HUD U0401:81 Invalid Data Received from ECM/PCM A:Invalid Serial Data Received GO to Pinpoint Test J HUD U0401:82 Invalid Data Received from ECM/PCM A:Alive/Sequence Counter Incorrect/Not Updated GO to Pinpoint Test J HUD U0405:56 Invalid Data Received From Cruise Control Module:Invalid/Incompatible Configuration GO to Pinpoint Test S HUD U0424:00 Invalid Data Received From HVAC Control Module:No Sub Type Information GO to Pinpoint Test M HUD U0424:81 Invalid Data Received From HVAC Control Module:Invalid Serial Data Received GO to Pinpoint Test M HUD U0424:82 Invalid Data Received From HVAC Control Module:Alive/Sequence Counter Incorrect/Not Updated GO to Pinpoint Test M HUD U0429:00 Invalid Data Received From Steering Column Control Module:No Sub Type Information GO to Pinpoint Test O HUD U0429:82 Invalid Data Received From Steering Column Control Module:Alive/Sequence Counter Incorrect/Not Updated GO to Pinpoint Test O HUD U0431:00 Invalid Data Received From Body Control Module "A":No Sub Type Information GO to Pinpoint Test K HUD U0509:82 Invalid Data Received From "Seat Control Module A":Alive/Sequence Counter Incorrect/Not Updated GO to Pinpoint Test N HUD U2100:00 Initial Configuration Not Complete:No Sub Type Information GO to Pinpoint Test T HUD U2300:55 Central Configuration:Not Configured GO to Pinpoint Test S HUD U3000:04 Control Module:System Internal Failures GO to Pinpoint Test U HUD U3000:41 Control Module:General Checksum Failure GO to Pinpoint Test U HUD U3000:42 Control Module:General Memory Failure GO to Pinpoint Test U HUD U3000:47 Control Module:Watchdog/Safety µC Failure GO to Pinpoint Test U HUD U3000:49 Control Module:Internal Electronic Failure GO to Pinpoint Test U HUD U3001:98 Control Module Improper Shutdown Performance:Component Or System Over Temperature GO to Pinpoint Test V HUD U3003:16 Battery Voltage:Circuit Voltage Below Threshold GO to Pinpoint Test X HUD U3003:17 Battery Voltage:Circuit Voltage Above Threshold GO to Pinpoint Test Y HUD U300A:64 Ignition Switch:Signal Plausibility Failure GO to Pinpoint Test W Symptom Chart Symptom Chart: HUD Diagnostics in this manual assume a certain skill level and knowledge of Ford-specific diagnostic practices...
Categories
- Manuals Home
- Lincoln Aviator Owners Manual
- Lincoln Aviator Service Manual
- Opening and Closing the Hood
- Wireless Accessory Charger (If Equipped)
- Interior Lamps
- New on site
- Most important about car
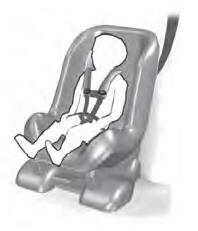
Child Seats

Use a child restraint (sometimes called an infant carrier, convertible seat, or toddler seat) for infants, toddlers and children weighing 40 lb (18 kg) or less (generally four-years-old or younger).
Using Lap and Shoulder Belts
WARNING: Do not place a rearward facing child restraint in front of an active airbag. Failure to follow this instruction could result in personal injury or death.
