Lincoln Aviator 2020-2026 Service Manual / Powertrain / Automatic Transmission / Automatic Transmission - 10-Speed Automatic Transmission – 10R60 / Removal and Installation - Selector Shaft Seal
Lincoln Aviator: Automatic Transmission - 10-Speed Automatic Transmission – 10R60 / Removal and Installation - Selector Shaft Seal
Special Tool(s) / General Equipment
.jpg) |
307-549 Installer, Shift Shaft Fluid Seal TKIT-2005D1-F1 |
Materials
| Name | Specification |
|---|---|
| Motorcraft® MERCON® ULV Automatic Transmission Fluid XT-12-QULV |
WSS-M2C949-A, MERCON® ULV |
Removal
-
With the vehicle in NEUTRAL, position it on a hoist.
Refer to: Jacking and Lifting (100-02 Jacking and Lifting, Description and Operation).
-
Remove the bolt, nuts and position aside the transmission fluid cooler.
.jpg) |
-
Disconnect the manual park overide lever.
.jpg) |
-
Remove the nut and the manual park overide lever.
.jpg) |
-
Remove and discard the selector shaft seal (7F337).
.jpg) |
Installation
-
Slide the selector shaft seal onto the manual shaft.
.jpg) |
-
Using the special tool, install the selector shaft seal.
Use Special Service Tool: 307-549 Installer, Shift Shaft Fluid Seal.
.jpg) |
-
Install the manual park overide lever and nut.
Torque: 106 lb.in (12 Nm)
.jpg) |
-
Connect the manual park overide lever.
.jpg) |
-
Inspect the transmission fluid cooler O-ring seals and
install new O-ring seals if necessary. Lubricate the O-ring seals.
Material: Motorcraft® MERCON® ULV Automatic Transmission Fluid / XT-12-QULV (WSS-M2C949-A, ) (MERCON® ULV)
.jpg) |
-
NOTICE: Make sure the oil cooler is completely installed against the transmission before tightening, or damage to the cooler could result.
Install the transmission fluid cooler and loosely install the bolt and the nuts by hand.
.jpg) |
-
NOTICE: Make sure the oil cooler is completely installed against the transmission before tightening, or damage to the cooler could result.
Tighten the bolt and nuts in the sequence shown.
Torque: 18 lb.ft (25 Nm)
.jpg) |
-
Check the transmission fluid level.
Refer to: Transmission Fluid Level Check (307-01A Automatic Transmission - 10-Speed Automatic Transmission – 10R60, General Procedures).
 Removal and Installation - Park Lock Pawl Solenoid
Removal
Remove the transmission fluid pan, gasket and filter.
Refer to: Transmission Fluid Pan, Gasket and Filter (307-01B Automatic Transmission - 10-Speed Automatic Transmission – 10R80 MHT, Removal and Installation)...
 Removal and Installation - Shift Solenoids (SS)
Materials
Name
Specification
Motorcraft® MERCON® ULV Automatic Transmission FluidXT-12-QULV
WSS-M2C949-A, MERCON® ULV
Removal
All Solenoids
Remove the transmission fluid pan gasket and filter...
Other information:
Lincoln Aviator 2020-2026 Service Manual: Removal and Installation - Starter Generator - 3.0L EcoBoost – Hybrid (BQ)
Special Tool(s) / General Equipment Locking Pliers Removal NOTE: Removal steps in this procedure may contain installation details. With the vehicle in NEUTRAL, position it on a hoist. Refer to: Jacking and Lifting (100-02 Jacking and Lifting, Description and Operation)...
Lincoln Aviator 2020-2026 Service Manual: Description and Operation - Intake Air Distribution and Filtering - Overview
Overview The air intake system cleans intake air with a replaceable, dry-type engine Air Cleaner (ACL) element made of treated, pleated paper. A new Air Cleaner (ACL) element must be installed periodically as scheduled. Engine performance and fuel economy are adversely affected when maximum restriction of the Air Cleaner (ACL) element is reached...
Categories
- Manuals Home
- Lincoln Aviator Owners Manual
- Lincoln Aviator Service Manual
- Tire Change Procedure
- Remove and Reinstall the Battery
- Drive Modes
- New on site
- Most important about car
Fastening the Seatbelts
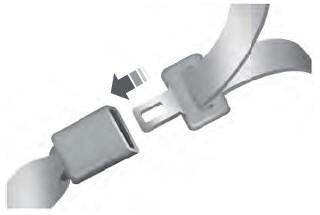
The front outboard and rear safety restraints in the vehicle are combination lap and shoulder belts.
Insert the belt tongue into the proper buckle (the buckle closest to the direction the tongue is coming from) until you hear a snap and feel it latch. Make sure that you securely fasten the tongue in the buckle.
Copyright © 2026 www.liaviator2.com
