Lincoln Aviator: Front Suspension - AWD / Removal and Installation - Upper Arm
Special Tool(s) / General Equipment
.jpg) |
204-592 Separator, Lower Arm Ball Joint TKIT-2006C-FFMFLM TKIT-2006C-LM TKIT-2006C-ROW |
Removal
NOTICE: Suspension fasteners are critical parts that affect the performance of vital components and systems. Failure of these fasteners may result in major service expense. Use the same or equivalent parts if replacement is necessary. Do not use a replacement part of lesser quality or substitute design. Tighten fasteners as specified.
NOTE: Removal steps in this procedure may contain installation details.
-
Measure the distance from the center of the hub to the
lip of the fender with the vehicle in a level, static ground position
(curb height).
.jpg) |
-
Remove the wheel and tire.
Refer to: Wheel and Tire (204-04A Wheels and Tires, Removal and Installation).
-
NOTICE: Never allow the knuckle to hang from the upper and lower control arms or damage to the ball joints can occur.
NOTE: Take care not to damage coating on suspension components.
Support the wheel knuckle assembly using mechanic's wire.
.jpg) |
-
NOTICE: Do not use power tools to remove or install the lower arm outboard nut. Damage to the ball joint or ball joint seal may occur.
NOTE: Use the TORX PLUS® holding feature to prevent the ball stud from turning while removing or installing the upper arm outboard nut. Torx® and TORX PLUS® is a reg. tm of Acument Intellectual Properties, LLC.
Remove and discard the upper ball joint nut.
.jpg) |
-
NOTICE: Do not use a hammer, prying device, or separator fork to separate the ball joint from the wheel knuckle. Damage to the ball joint or ball joint seal may occur.
NOTICE: Use care when releasing the upper arm and wheel knuckle into the resting position. Damage to the ball joint or ball joint seal may occur.
Separate the front upper arm from the wheel Knuckle.
Use Special Service Tool: 204-592 Separator, Lower Arm Ball Joint.
.jpg) |
-
Remove and discard the upper arm-to-frame bolts and nuts and remove the upper arm.
.jpg) |
Installation
NOTICE: Tighten the suspension fasteners with the weight of the vehicle on the wheels and tires or use a suitable jack to raise the suspension to curb height or damage to the bushings may occur.
-
NOTE: Only tighten the nuts and bolts finger tight at this stage.
NOTE: Make sure that the mating wheel knuckle face is clean and free of foreign material.
Position the upper arm and install the new upper arm-to-frame bolts and nuts.
.jpg) |
-
NOTICE: Do not use power tools to remove or install the lower arm outboard nut. Damage to the ball joint or ball joint seal may occur.
NOTE: Use the TORX PLUS® holding feature to prevent the ball stud from turning while removing or installing the upper arm outboard nut. Torx® and TORX PLUS® is a reg. tm of Acument Intellectual Properties, LLC.
Install the upper arm ball joint nut.
Torque: 41 lb.ft (55 Nm)
.jpg) |
-
Use a suitable jack to raise the suspension until the
distance between the center of the hub and the lip of the fender is
equal to the measurement taken during removal (curb height).
.jpg) |
-
NOTICE: Tighten the suspension fasteners with the weight of the vehicle on the wheels and tires or use a suitable jack to raise the suspension to curb height or damage to the bushings may occur.
NOTE: Only tighten the nuts and bolts when the suspension is in the normal drive position.
Tighten the new upper arm bolts and nuts.
Torque: 85 lb.ft (115 Nm)
.jpg) |
-
Install the wheel and tire.
Refer to: Wheel and Tire (204-04A Wheels and Tires, Removal and Installation).
-
If equipped with dynamic suspension, calibrate the
suspension system. Connect the scan tool and carry out the Ride Height
Calibration routine. Follow the scan tool directions.
 Removal and Installation - Rear Lower Arm
Special Tool(s) /
General Equipment
204-592Separator, Lower Arm Ball JointTKIT-2006C-FFMFLMTKIT-2006C-LMTKIT-2006C-ROW
Vehicle/Axle Stands
Removal
NOTICE:
Suspension fasteners are critical parts that affect the
performance of vital components and systems...
Other information:
Lincoln Aviator 2020-2026 Owners Manual: System Errors. Switching the System On and Off
System Errors If the system detects a fault, a warning lamp illuminates and a message displays. Switching the System On and Off You can switch the blind spot information system with trailer tow off by not selecting a trailer the information display...
Lincoln Aviator 2020-2026 Service Manual: General Procedures - Fixed Glass
Special Tool(s) / General Equipment Power Caulk Gun Power Fixed Glass Removal Tool Cold Knife Knife Vacuum Cleaner Materials Name Specification Sika® SikaTack® MACH 60 / Sika® SikaTack® MACH 30 / Dow® BETASEAL™ Express - Sika Tack ASAP Urethane Adhesive - Motorcraft® Ultra-Clear Spray Glass CleanerZC-23 ESR-M14P5-A Sika Tack® MOVE...
Categories
- Manuals Home
- Lincoln Aviator Owners Manual
- Lincoln Aviator Service Manual
- Keyless Entry
- Description and Operation - Body and Frame
- USB Port and Power Point Locations
- New on site
- Most important about car
Remote Control
Passive Key

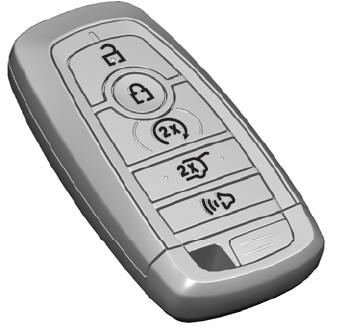
The passive key operates the power locks and the remote start system. The passive key must be in your vehicle to use the push button start.
Note: You may not be able to shift out of park (P) unless the passive key is inside your vehicle.

