Lincoln Aviator: Hydraulic Brake Actuation / Removal and Installation - Brake Fluid Reservoir
Removal
NOTICE: Siphon the brake fluid from the HCU/EBB reservoir, if the reservoir is not emptied there will be a large amount of brake fluid spilled in the engine compartment.
NOTE: Removal steps in this procedure may contain installation details.
-
Remove the cowl panel grille.
Refer to: Cowl Panel Grille (501-02 Front End Body Panels, Removal and Installation).
-
Release the tabs and remove the BCMC cover.
.jpg) |
-
-
Remove the nut and position aside the cable aside.
Torque: 106 lb.in (12 Nm)
-
Fully loosen the BCMC connector bolts.
Torque: 48 lb.in (5.4 Nm)
-
Remove the nut and position aside the cable aside.
.jpg) |
-
Release the tabs and remove the BCMC.
.jpg) |
-
Remove the bolts, detach the wiring retainers and then remove the BCMC support bracket.
Torque: 106 lb.in (12 Nm)
.jpg) |
-
NOTICE: If the brake fluid is spilled on any component, the affected area must be immediately washed down with cold water.
NOTE: Be prepared to collect escaping fluid.
Disconnect the remote brake fluid reservoir tube and drain the fluid into a suitable container.
.jpg) |
-
Disconnect the electrical connectors.
.jpg) |
-
Disconnect the electrical connector.
.jpg) |
-
Syphon and remove the brake fluid with the help of flexible hose and syringe.
.jpg) |
-
NOTE: Brake fluid reservoir mounting screws and the sealings plugs are supplied with the brake fluid reservoir kit.
Remove the screws and the brake fluid reservoir. Discard the screws.
Torque: 23 lb.in (2.6 Nm)
.jpg) |
-
NOTE: Brake fluid reservoir mounting screws and the sealings plugs are supplied with the brake fluid reservoir kit.
Ensure that old brake fluid reservoir sealing washers are removed before installing new reservoir with new washers.
.jpg) |
Installation
-
To install, reverse the removal procedure.
-
Remove the remote brake fluid reservoir cap.
.jpg) |
-
Fill the reservoir with clean, specified brake fluid.
Refer to: Specifications (206-00 Brake System - General Information, Specifications).
.jpg) |
 Removal and Installation - Brake Pedal and Bracket
Removal
NOTE:
Removal steps in this procedure may contain installation details.
Remove the BCM.
Refer to: Body Control Module (BCM) (419-10 Multifunction Electronic Modules, Removal and Installation)...
Other information:
Lincoln Aviator 2020-2026 Owners Manual: Setting a Destination
Destination Entry Menu Setting a Destination Using the Text Entry Screen Text entry field. Automatic suggestions based on the text you enter. Information icon. Search. Keyboard settings. Note: Select one of the suggestions to copy the detail to the text entry field...
Lincoln Aviator 2020-2026 Service Manual: Diagnosis and Testing - Engine
Inspection and Verification - Engine Performance NOTE: There are 2 diagnostic paths that can be followed depending on the type of engine concern. Carry out Inspection and Verification - Engine Performance or Inspection and Verification - NVH. Some engines and transmissions are equipped with PTLP (powertrain limiting and protection) strategy that will limit power under various conditions to protect the engine and the transmission...
Categories
- Manuals Home
- Lincoln Aviator Owners Manual
- Lincoln Aviator Service Manual
- USB Port and Power Point Locations
- Description and Operation - Body and Frame
- Interior Lamps
- New on site
- Most important about car
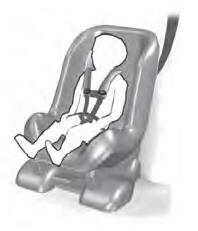
Child Seats

Use a child restraint (sometimes called an infant carrier, convertible seat, or toddler seat) for infants, toddlers and children weighing 40 lb (18 kg) or less (generally four-years-old or younger).
Using Lap and Shoulder Belts
WARNING: Do not place a rearward facing child restraint in front of an active airbag. Failure to follow this instruction could result in personal injury or death.

