Lincoln Aviator: Front Disc Brake / Removal and Installation - Brake Pads
Special Tool(s) / General Equipment
| 12” / 300mm C-Clamp |
Removal
.jpg) WARNING:
Service actions on vehicles equipped with electronic brake
booster and electronic parking brakes may cause unexpected brake
application, which could result in injury to hands or fingers. Put the
brake system into service mode prior to servicing or removing any brake
components. Failure to follow this instruction may result in serious
personal injury.
WARNING:
Service actions on vehicles equipped with electronic brake
booster and electronic parking brakes may cause unexpected brake
application, which could result in injury to hands or fingers. Put the
brake system into service mode prior to servicing or removing any brake
components. Failure to follow this instruction may result in serious
personal injury.
-
Activate the brake service mode.
Refer to: Brake Service Mode Activation and Deactivation (206-00 Brake System - General Information, General Procedures).
-
Remove the wheel and tire.
Refer to: Wheel and Tire (204-04A Wheels and Tires, Removal and Installation).
-
NOTICE: Do not pry in the caliper sight hole to retract the pistons as this can damage the pistons and boots.
NOTICE: Do not allow the brake caliper to hang from the brake hose or damage to the hose can occur.
Remove the bolts and position the brake caliper aside.
.jpg) |
-
Remove the brake pads.
.jpg) |
-
Remove the brake pad clips. Discard if installing new brake pads.
.jpg) |
-
NOTICE: Protect the caliper pistons and boots when pushing the caliper piston into the caliper piston bores or damage to components may occur.
If installing new brake pads.
Use a C-clamp and a worn brake pad to compress the disc brake caliper pistons into the brake caliper bore.
Use the General Equipment: 12” / 300mm C-Clamp
.jpg) |
Installation
NOTICE: Make sure that the brake hose is not twisted when installing the brake caliper or damage to the brake flexible hose may occur.
-
Clean the brake pad-to-anchor plate contact surfaces.
.jpg) |
-
Install the new brake pad clips.
.jpg) |
-
NOTE: Make sure to apply the grease supplied with the brake pad kit to the brake pad-to-anchor plate contact points.
Clean the brake pad-to-anchor plate contact surfaces and apply the grease supplied with the brake pad kit.
.jpg) |
-
Install the new brake pads.
.jpg) |
-
Install the brake caliper and tighten the guide pin bolts.
Torque:
M8 :: 20 lb.ft (27 Nm)
M10 :: 34 lb.ft (46 Nm)
.jpg) |
-
Deactivate the brake service mode.
Refer to: Brake Service Mode Activation and Deactivation (206-00 Brake System - General Information, General Procedures).
-
Depress the brake pedal, check the brake fluid level in
the brake fluid reservoir and top up as necessary with brake fluid.
Refer to: Specifications (206-00 Brake System - General Information, Specifications).
-
Install the wheel and tire.
Refer to: Wheel and Tire (204-04A Wheels and Tires, Removal and Installation).
 Removal and Installation - Brake Disc Shield
Removal
NOTE:
Removal steps in this procedure may contain installation details.
Remove the brake disc.
Refer to: Brake Disc (206-03 Front Disc Brake, Removal and Installation)...
 Removal and Installation - Front Brake Flexible Hose
Removal
WARNING:
Service actions on vehicles equipped with electronic brake
booster and electronic parking brakes may cause unexpected brake
application, which could result in injury to hands or fingers...
Other information:
Lincoln Aviator 2020-2025 Service Manual: Removal and Installation - Battery Monitoring Sensor
Removal NOTE: When the battery is disconnected and connected, some abnormal drive symptoms may occur while the vehicle relearns its adaptive strategy. The vehicle may need to be driven to allow the PCM to relearn the adaptive strategy values. NOTE: Removal steps in this procedure may contain installation details...
Lincoln Aviator 2020-2025 Service Manual: Removal and Installation - Fuel Filler Door Assembly
Special Tool(s) / General Equipment Flat Headed Screw Driver Knife Removal NOTE: Removal steps in this procedure may contain installation details. NOTE: The fuel filler door assembly is damaged during the removal process and requires a new fuel filler door assembly installed...
Categories
- Manuals Home
- Lincoln Aviator Owners Manual
- Lincoln Aviator Service Manual
- Drive Modes
- Description and Operation - Jacking and Lifting
- Fuel Quality
- New on site
- Most important about car
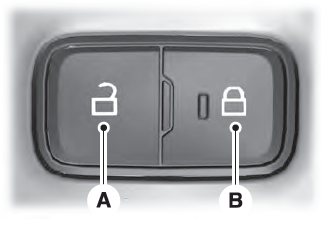
Locking and Unlocking the Doors from Inside

Locking the Doors
Press the lock switch on the door interior trim panel. The doors can no longer be released using the exterior door handle switches and the luggage compartment locks.
