Lincoln Aviator 2020-2026 Service Manual / Body and Paint / Body and Paint / Glass, Frames and Mechanisms / Removal and Installation - Driver Door Window Control Switch
Lincoln Aviator: Glass, Frames and Mechanisms / Removal and Installation - Driver Door Window Control Switch
Special Tool(s) / General Equipment
| Interior Trim Remover |
Removal
-
Remove the driver door window control switch bezel assembly.
-
Release the clips.
Use the General Equipment: Interior Trim Remover
-
Disconnect the driver door window control switch electrical connector.
-
Disconnect the door lock control switch electrical
connector and remove the driver door window control switch bezel
assembly.
-
Release the clips.
.jpg) |
-
NOTE: This step is only necessary when installing a new component.
Remove the driver door window control switch.
-
Remove the screws from driver door window control switch.
-
Remove the driver door window control switch from the bezel assembly..
-
Remove the screws from driver door window control switch.
.jpg) |
Installation
-
To install, reverse the removal procedure.
 General Procedures - Power Door Window Initialization
Initialization
WARNING:
Before beginning any service procedure in this
section, refer to Safety Warnings in section 100-00 General Information...
 Removal and Installation - Front Door Glass Run and Bracket
Removal
NOTE:
LH (left-hand) side shown, RH (right-hand) side similar.
NOTE:
Removal steps in this procedure may contain installation details.
Aft front door glass run and bracket
Remove the front door window regulator and motor...
Other information:
Lincoln Aviator 2020-2026 Service Manual: Removal and Installation - Radiator
Removal NOTE: Removal steps in this procedure may contain installation details. Remove the cooling module. Refer to: Cooling Module (303-03A Engine Cooling - 3.0L EcoBoost, Removal and Installation). Remove the bolt, release the tabs and remove the A/C condenser...
Lincoln Aviator 2020-2026 Service Manual: Removal and Installation - Rear Bumper Cover
Special Tool(s) / General Equipment Interior Trim Remover Removal NOTE: Removal steps in this procedure may contain installation details. Remove the rear wheel and tire assemblies. Refer to: Wheel and Tire (204-04A Wheels and Tires, Removal and Installation)...
Categories
- Manuals Home
- Lincoln Aviator Owners Manual
- Lincoln Aviator Service Manual
- Opening and Closing the Hood
- Keyless Entry
- USB Port and Power Point Locations
- New on site
- Most important about car
Child Safety Locks
When the child safety locks are set, you cannot open the rear doors from the inside.

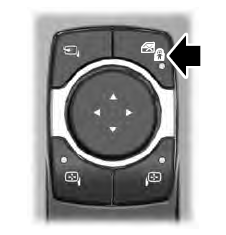
The child safety lock control is on the driver door.
Press the control to switch the child safety locks on. Press the control again to switch them off. A light on the child safety control illuminates when you switch them on.
Copyright © 2026 www.liaviator2.com
