Lincoln Aviator 2020-2026 Service Manual / Body and Paint / Body and Paint / Instrument Panel and Console / Removal and Installation - Glove Compartment
Lincoln Aviator: Instrument Panel and Console / Removal and Installation - Glove Compartment
Special Tool(s) / General Equipment
| Interior Trim Remover |
Removal
NOTE: Removal steps in this procedure may contain installation details.
-
Release the clips and remove the finish panel.
Use the General Equipment: Interior Trim Remover
.jpg) |
-
Release the clips and remove the switch.
-
Disconnect the electrical connector.
Use the General Equipment: Interior Trim Remover
-
Disconnect the electrical connector.
.jpg) |
-
Remove the instrument panel center finish panel.
-
Remove the bolt.
Torque: 28 lb.in (3.2 Nm)
-
Release the clips and remove the instrument panel center finish panel.
-
Disconnect the electrical connector.
-
Remove the bolt.
.jpg) |
-
Open the glove compartment.
-
Remove the check strap.
-
Push the tabs inward and fully lower the glove compartment.
-
Remove the check strap.
.jpg) |
-
Release the clips and remove the RH trim panel.
Use the General Equipment: Interior Trim Remover
.jpg) |
-
Remove the glove compartment assembly.
-
Remove the bolts.
Torque: 37 lb.in (4.2 Nm)
-
Remove the bolts, release the clips and remove the glove compartment assembly.
Torque: 28 lb.in (3.2 Nm)
-
Disconnect the electrical connector.
-
Remove the bolts.
.jpg) |
Installation
-
To install, reverese the removal procedure.
 Removal and Installation - Floor Console
Special Tool(s) /
General Equipment
Interior Trim Remover
Removal
NOTE:
Removal steps in this procedure may contain installation details...
 Removal and Installation - Instrument Panel
Special Tool(s) /
General Equipment
Interior Trim Remover
Removal
NOTE:
Removal steps in this procedure may contain installation details...
Other information:
Lincoln Aviator 2020-2026 Owners Manual: Motorcraft Parts - Plug-In Hybrid Electric Vehicle (PHEV)
1 If a Motorcraft oil filter is not available, use an oil filter that meets industry performance specification SAE/USCAR-36. 2 See your authorized dealer for correct replacement. 3 For spark plug replacement, contact your authorized dealer. Replace the spark plugs at the appropriate intervals...
Lincoln Aviator 2020-2026 Owners Manual: Passenger Compartment Fuse Panel
T..
Categories
- Manuals Home
- Lincoln Aviator Owners Manual
- Lincoln Aviator Service Manual
- Fuel Quality
- Description and Operation - Jacking and Lifting
- Tire Change Procedure
- New on site
- Most important about car
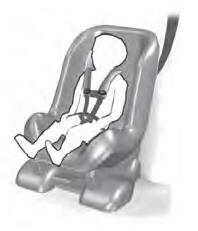
Child Seats

Use a child restraint (sometimes called an infant carrier, convertible seat, or toddler seat) for infants, toddlers and children weighing 40 lb (18 kg) or less (generally four-years-old or younger).
Using Lap and Shoulder Belts
WARNING: Do not place a rearward facing child restraint in front of an active airbag. Failure to follow this instruction could result in personal injury or death.
Copyright © 2026 www.liaviator2.com
