Lincoln Aviator 2020-2026 Service Manual / Electrical / Information and Entertainment Systems / Information and Entertainment System - General Information / Removal and Installation - Subwoofer Amplifier
Lincoln Aviator: Information and Entertainment System - General Information / Removal and Installation - Subwoofer Amplifier
Removal
NOTE: Removal steps in this procedure may contain installation details.
-
Remove the LH loadspace trim panel.
Refer to: Loadspace Trim Panel (501-05 Interior Trim and Ornamentation, Removal and Installation).
-
Position the subwoofer assembly to access rear connectors.
-
Remove the nut and bracket.
Torque: 80 lb.in (9 Nm)
-
Remove the bolts.
Torque: 80 lb.in (9 Nm)
-
Remove the nut and bracket.
.jpg) |
-
Disconnect the electrical connector and remove the subwoofer assembly.
.jpg) |
-
Remove the screws and the amplifier.
.jpg) |
Installation
-
To install, reverse the removal procedure.
 Removal and Installation - Satellite Radio / Global Positioning System (GPS) Splitter / Cable
Removal
NOTE:
Removal steps in this procedure may contain installation details.
Remove the RH loadspace trim panel.
Refer to: Loadspace Trim Panel (501-05 Interior Trim and Ornamentation, Removal and Installation)...
Other information:
Lincoln Aviator 2020-2026 Service Manual: Removal and Installation - Second Row Air Distribution Door Actuator
Removal NOTE: Removal steps in this procedure may contain installation details. Remove the floor console. Refer to: Floor Console (501-12 Instrument Panel and Console, Removal and Installation). Remove the bolts and the duct section...
Lincoln Aviator 2020-2026 Service Manual: Removal and Installation - Cooling Fan Motor and Shroud
Special Tool(s) / General Equipment Hose Clamp Remover/Installer Removal Remove the air cleaner. Refer to: Air Cleaner (303-12 Intake Air Distribution and Filtering - 3.0L EcoBoost/3.0L EcoBoost – Hybrid (BQ), Removal and Installation)...
Categories
- Manuals Home
- Lincoln Aviator Owners Manual
- Lincoln Aviator Service Manual
- Description and Operation - Jacking and Lifting
- Keyless Entry
- Wireless Accessory Charger (If Equipped)
- New on site
- Most important about car
Remote Control
Passive Key

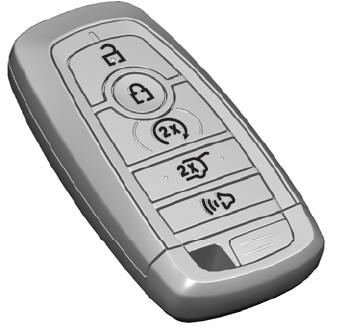
The passive key operates the power locks and the remote start system. The passive key must be in your vehicle to use the push button start.
Note: You may not be able to shift out of park (P) unless the passive key is inside your vehicle.
Copyright © 2026 www.liaviator2.com

