
Lincoln Aviator: Front End Body Panels / Description and Operation - Active Grille Shutter - Overview
Overview
The AGS (Active Grille Shutter) system is primarily used to improve fuel economy by reducing aerodynamic drag while the vehicle in moving. It is also used to shorten engine warm-up time, which increases engine efficiency and provides faster heat delivery to the vehicle cabin. The active grille shutter actuator receives position commands from the PCM via the LIN.
Each AGS (Active Grille Shutter) system assembly is comprised of a set of vanes, linkage hardware and an active grille shutter actuator (motor).
The active grille shutter system carries out a self-calibration sequence whenever the engine is started, fully opening and closing the shutters before being positioned to the desired opening position as requested by the PCM.
AGS (Active Grille Shutter) will also be active in HEV, during plug-in charging to provide airflow for HEV cabin climate conditioning and component cooling when the vehicle is stationary. In HEV vehicles, the desired AGS (Active Grill Shutter) position request is transmitted by the SOBDMC and received by the PCM.
Regardless of the hardware modules present in a vehicle, the PCM will send the appropriate control signal to the Active Grill Motor.
A vehicle may be fitted with a single or a dual AGS (Active Grill Shutter) hardware system, depending on vehicle type, front end packaging and underhood / powertrain hardware components installed. Each system uses a separate AGS (Active Grill Shutter) motor that can be controlled independently, depending on system requirements. It also provides its own diagnostic status to the PCM for monitoring.

 Description and Operation - Active Grille Shutter - System Operation and Component Description
System Operation
System Diagram
Item
Description
1
HS-CAN
2
LIN
3
Lower Active Grille Shutter Actuator
4
Upper Active Grille Shutter Actuator
5
ABS
6
SOBDMC
7
PCM
Network Message Chart
PCM Network Input Messages
Broadcast Message
Originating Module
Message Purpose
Vehicle speed
ABS module
Vehicle speed is used to determine positioning of the active grille shutters...
Other information:
Lincoln Aviator 2020-2026 Service Manual: Description and Operation - Handles, Locks, Latches and Entry Systems - Component Location
N..
Lincoln Aviator 2020-2026 Service Manual: Removal and Installation - Second Row Seat Armrest
Special Tool(s) / General Equipment Interior Trim Remover Removal NOTE: Removal steps in this procedure may contain installation details. Remove the second row center seat. Refer to: Second Row Center Seat (501-10B Second Row Seats, Removal and Installation)...
Categories
- Manuals Home
- Lincoln Aviator Owners Manual
- Lincoln Aviator Service Manual
- Resetting the System
- Drive Modes
- Description and Operation - Body and Frame
- New on site
- Most important about car
Remote Control
Passive Key
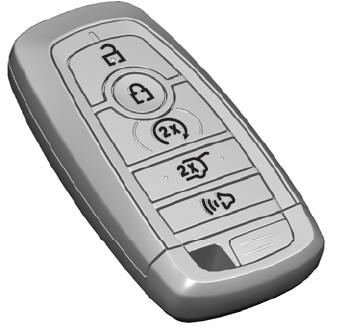
The passive key operates the power locks and the remote start system. The passive key must be in your vehicle to use the push button start.
Note: You may not be able to shift out of park (P) unless the passive key is inside your vehicle.
