Lincoln Aviator: Maintenance / Engine Coolant Check
WARNING: Do not remove the coolant reservoir cap when the engine is on or the cooling system is hot. Wait 10 minutes for the cooling system to cool down. Cover the coolant reservoir cap with a thick cloth to prevent the possibility of scalding and slowly remove the cap. Failure to follow this instruction could result in personal injury.
WARNING: Do not put coolant in the windshield washer reservoir. If sprayed on the windshield, coolant could make it difficult to see through the windshield.
WARNING: To reduce the risk of personal injury, make sure the engine is cool before unscrewing the coolant pressure relief cap. The cooling system is under pressure. Steam and hot liquid can come out forcefully when you loosen the cap slightly.
WARNING: Do not add coolant further than the MAX mark.
When the engine is cold, check the concentration and level of the coolant at the intervals listed in the scheduled maintenance information.
Note: Make sure that the coolant level is between the MIN and MAX marks on the coolant reservoir.
Note: Coolant expands when it is hot. The level may extend beyond the MAX mark.
Maintain coolant concentration within 48% to 50%, which equates to a freeze point between -29°F (-34°C) and -35°F (-37°C). Coolant concentration should be checked using a refractometer. We do not recommend the use of hydrometers or coolant test strips for measuring coolant concentration.
 Changing the Engine Air Filter
WARNING: To reduce the risk of
vehicle damage and personal burn injuries,
do not start your engine with the air
cleaner removed and do not remove it
while the engine is running...
 Adding Coolant
WARNING: Do not add engine
coolant when the engine is on or the
cooling system is hot. Failure to follow this
instruction could result in personal injury...
Other information:
Lincoln Aviator 2020-2026 Service Manual: Removal and Installation - Liftgate Trim Panel
Special Tool(s) / General Equipment Interior Trim Remover Removal Release the clips and remove the liftgate center upper trim panel. Use the General Equipment: Interior Trim Remover Release the clips and remove the liftgate RH upper trim panel...
Lincoln Aviator 2020-2026 Service Manual: Removal and Installation - Gateway Module A (GWM)
Removal NOTE: Removal steps in this procedure may contain installation details. NOTE: If installing a new module, it is necessary to upload the module configuration information to the scan tool prior to removing the module. This information must be downloaded into the new module after installation...
Categories
- Manuals Home
- Lincoln Aviator Owners Manual
- Lincoln Aviator Service Manual
- Remove and Reinstall the Battery
- Drive Modes
- Fuel Quality
- New on site
- Most important about car
Activating Intelligent Access
The intelligent access key must be within 3 ft (1 m) of the door or luggage compartment you intend to lock or unlock.
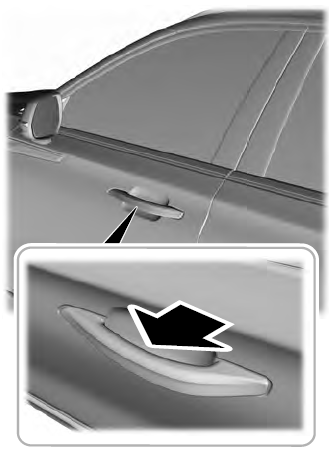
At a Door
Electronic door handles are on each door. Gently depress the switch inside the exterior door handle to unlock and open the door. An unlock symbol illuminates on the door window trim indicating your vehicle is unlocked.