Lincoln Aviator: Cruise Control / General Procedures - Cruise Control Radar Alignment
Activation
Vertical Alignment
NOTE: In order to align the CCM, the front bumper cover must be removed to access the sensor and the vehicle must be in a wheel alignment bay station so that the vehicle is level.
NOTE: Damage to the CCM bracket may affect correct alignment. When aligning the CCM, inspect the CCM bracket for damage and repair as necessary before carrying out the alignment procedure.
-
Remove the front bumper cover.
Refer to: Front Bumper Cover (501-19 Bumpers, Removal and Installation).
-
Place the vehicle on a wheel alignment bay station.
-
Locate the CCM alignment screw.
.jpg) |
-
NOTE: Measurement must be taken from the non-raised side of the CCM.
Place a combination square level on the face of the CCM and check the alignment.
.jpg) |
-
NOTE: Measurement must be taken from the non-raised side of the CCM.
Keeping the combination square level on the face of the CCM, adjust the pitch by using an E20 Torx® bit to adjust the screw until the CCM is vertical and level.
.jpg) |
-
NOTE: Prior to installing the front bumper cover, clean and remove any debris on the front or back of the cover.
Install the front bumper cover.
Refer to: Front Bumper Cover (501-19 Bumpers, Removal and Installation).
Horizontal Alignment
NOTE: The horizontal alignment for the CCM is a software calibration check that is performed by the scan tool to insure the CCM radar is pointed straight. No manual adjustment is needed for this procedure. The scan tool calibrates the CCM through the CCM procedure in programmable parameters. The Alignment Offset specification is +/- 3.0 degrees of offset.
-
NOTICE: The vehicle's engine must be running during the horizontal alignment procedure. Failure to leave the engine running throughout the entire procedure results in the cancellation of the alignment procedure and the system remains non-functional.
Start the engine.
-
Follow the scan tool on-screen instructions to carry-out the CCM calibration procedure.
 Diagnosis and Testing - Cruise Control - Vehicles With: Adaptive Cruise Control With Lane Centering
Diagnostic Trouble Code (DTC) Chart
Diagnostics in this manual assume a certain skill level and knowledge of Ford-specific diagnostic practices. REFER to: Diagnostic Methods (100-00 General Information, Description and Operation)...
 Removal and Installation - Cruise Control Module (CCM)
Removal
NOTE:
Removal steps in this procedure may contain installation details.
All vehicles
NOTE:
If installing a new CCM,
it is necessary to upload the module configuration information to the
scan tool prior to removing the module...
Other information:
Lincoln Aviator 2020-2026 Owners Manual: Engine Oil Check
Engine Oil Dipstick Engine Oil Check To check the engine oil level consistently and accurately, do the following: Make sure the parking brake is on. Make sure the transmission is in park (P) or neutral (N). Run the engine until it reaches normal operating temperature...
Lincoln Aviator 2020-2026 Service Manual: Removal and Installation - Hood Latch Release Handle
Removal Remove the hood latch release handle. Rotate the hood latch release handle. NOTE: Do not remove the retaining clip from the hood latch release handle. Release the retaining clip. Remove the hood latch release handle...
Categories
- Manuals Home
- Lincoln Aviator Owners Manual
- Lincoln Aviator Service Manual
- Description and Operation - Jacking and Lifting
- USB Port and Power Point Locations
- Configuring The Head Up Display
- New on site
- Most important about car
Child Safety Locks
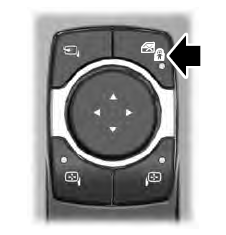
When the child safety locks are set, you cannot open the rear doors from the inside.

The child safety lock control is on the driver door.
Press the control to switch the child safety locks on. Press the control again to switch them off. A light on the child safety control illuminates when you switch them on.
