Lincoln Aviator 2020-2026 Service Manual / Body and Paint / Body and Paint / Body Closures / General Procedures - Hood Alignment
Lincoln Aviator: Body Closures / General Procedures - Hood Alignment
Adjustment
NOTE: Removal steps in this procedure may contain installation details.
All alignments
-
Remove the hood latch.
Refer to: Hood Latch (501-14 Handles, Locks, Latches and Entry Systems, Removal and Installation).
-
Remove the nuts and the striker assembly.
Torque: 80 lb.in (9 Nm)
.jpg) |
Hood fore and aft, left and right alignments
-
Detach the struts and loosen the nuts to permit movement of the hood.
Loosen:
: 2 turn(s)
.jpg) |
-
Carefully close the hood.
.jpg) |
-
Adjust the hood as required.
.jpg) |
-
Carefully open the hood.
.jpg) |
-
Tighten the nuts install the Hood struts.
Torque: 18 lb.ft (25 Nm)
.jpg) |
Hood front up and down alignments
-
Adjust the bump stop rubbers.
.jpg) |
-
Adjust the hood as required.
.jpg) |
All alignments
-
Install the striker assembly.
Torque: 80 lb.in (9 Nm)
.jpg) |
-
Loosen the nuts to permit movement of the striker assembly.
Loosen:
: 2 turn(s)
.jpg) |
-
Tighten the nuts.
Torque: 80 lb.in (9 Nm)
.jpg) |
-
Inspect the body-to-hood alignment.
.jpg) |
-
Install the removed components.
 General Procedures - Front Door Alignment
Adjustment
NOTE:
Removal steps in this procedure may contain installation details.
NOTE:
LH side shown, RH side similar.
All alignments
Open the door...
 General Procedures - Liftgate Alignment
Special Tool(s) /
General Equipment
Interior Trim Remover
Materials
Name
Specification
Seam SealerTA-2-B, 3M™ 08308, LORD Fusor® 803DTM
-
Adjustment
NOTE:
Removal steps in this procedure may contain installation details...
Other information:
Lincoln Aviator 2020-2026 Owners Manual: Rear View Camera
WARNING: The rear view camera system is a reverse aid supplement device that still requires the driver to use it in conjunction with the interior and exterior mirrors for maximum coverage. WARNING: Objects that are close to either corner of the bumper or under the bumper, might not be seen on the screen due to the limited coverage of the camera system...
Lincoln Aviator 2020-2026 Service Manual: Removal and Installation - Positive Crankcase Ventilation (PCV) Valve
Removal NOTE: Removal steps in this procedure may contain installation details. Disconnect the PCV valve quick release coupling. Refer to: Quick Release Coupling (310-00A Fuel System - General Information - 3.0L EcoBoost, General Procedures)...
Categories
- Manuals Home
- Lincoln Aviator Owners Manual
- Lincoln Aviator Service Manual
- Remove and Reinstall the Battery
- Anti-Theft Alarm
- Body and Paint
- New on site
- Most important about car
Child Safety Locks
When the child safety locks are set, you cannot open the rear doors from the inside.

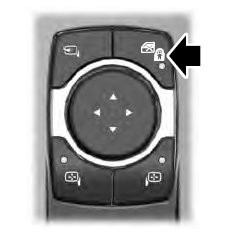
The child safety lock control is on the driver door.
Press the control to switch the child safety locks on. Press the control again to switch them off. A light on the child safety control illuminates when you switch them on.
Copyright © 2026 www.liaviator2.com
