Lincoln Aviator 2020-2026 Service Manual / Body and Paint / Body and Paint / Body Closures / General Procedures - Front Door Alignment
Lincoln Aviator: Body Closures / General Procedures - Front Door Alignment
Adjustment
NOTE: Removal steps in this procedure may contain installation details.
NOTE: LH side shown, RH side similar.
All alignments
-
Open the door.
.jpg) |
-
Remove the bolts and the striker assembly.
Torque: 18 lb.ft (25 Nm)
.jpg) |
Front door in and out, up and down alignment
-
Loosen the bolts to permit movement of the door.
Loosen:
: 2 turn(s)
.jpg) |
-
Adjust the door as required.
.jpg) |
-
Tighten the bolts.
Torque: 35 lb.ft (48 Nm)
.jpg) |
Front door fore, aft and tilt alignment
-
Loosen the bolts to permit movement of the door.
Loosen:
: 2 turn(s)
.jpg) |
-
Carefully close the door.
.jpg) |
-
Adjust the door as required.
.jpg) |
-
Carefully open the door.
.jpg) |
-
Tighten the bolts.
Torque:
1.: 22 lb.ft (30 Nm)
2.: 89 lb.in (10 Nm)
.jpg) |
All alignments
-
Install the striker assembly.
Torque: 18 lb.ft (25 Nm)
.jpg) |
-
Loosen the bolts to permit movement of the striker assembly.
Loosen:
: 2 turn(s)
.jpg) |
-
Tighten the bolts.
Torque: 18 lb.ft (25 Nm)
.jpg) |
-
Inspect the body-to-front door alignment.
.jpg) |
 Diagnosis and Testing - Body Closures
Diagnostic Trouble Code (DTC) Chart
Diagnostics in this manual assume a certain skill level and knowledge of Ford-specific diagnostic practices. REFER to: Diagnostic Methods (100-00 General Information, Description and Operation)...
 General Procedures - Hood Alignment
Adjustment
NOTE:
Removal steps in this procedure may contain installation details.
All alignments
Remove the hood latch.
Refer to: Hood Latch (501-14 Handles, Locks, Latches and Entry Systems, Removal and Installation)...
Other information:
Lincoln Aviator 2020-2026 Service Manual: Removal and Installation - Low Voltage Differential Signalling (LVDS) Cable
Special Tool(s) / General Equipment Interior Trim Remover Removal NOTE: Removal steps in this procedure may contain installation details. Remove the FDIM Refer to: Front Display Interface Module (FDIM) (415-00 Information and Entertainment System - General Information, Removal and Installation)...
Lincoln Aviator 2020-2026 Service Manual: Description and Operation - Climate Control System - Overview
Vehicles with: Dual Automatic Temperature Control (DATC) Overview The DATC system maintains the selected vehicle interior temperature by heating and/or cooling the air depending on the HVAC control panel selection. The driver may override the automatic mode of operation...
Categories
- Manuals Home
- Lincoln Aviator Owners Manual
- Lincoln Aviator Service Manual
- Garage Door Opener
- Configuring The Head Up Display
- Drive Modes
- New on site
- Most important about car
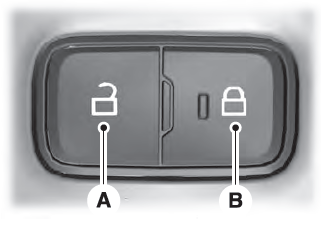
Locking and Unlocking the Doors from Inside

Locking the Doors
Press the lock switch on the door interior trim panel. The doors can no longer be released using the exterior door handle switches and the luggage compartment locks.
Copyright © 2026 www.liaviator2.com
