Lincoln Aviator: Climate Control System - General Information / Removal and Installation - Desiccant Bag - 3.0L EcoBoost
Special Tool(s) / General Equipment
| Long Nose Pliers |
Removal
NOTICE: During the removal of components, cap, tape or otherwise appropriately protect all openings to prevent the ingress of dirt or other contamination. Remove protective materials prior to installation.
NOTE: Installation of a new desiccant bag is not required when repairing the A/C system, except when there is physical evidence of contamination from a failed A/C compressor or damage to the receiver/drier desiccant bag. It is not necessary to add additional dye to the refrigerant system, the new receiver/drier desiccant bag comes with a new dye pellet. Damage to the receiver/drier desiccant bag includes physical damage to the receiver/drier desiccant bag or moisture contamination. Moisture contamination results only from a complete loss of refrigerant and equalization of the refrigerant system pressure with atmospheric pressure for a period longer than one hour. If even a slight amount of positive refrigerant pressure is present in the system before repairs are carried out, the receiver/drier desiccant bag should not be replaced.
NOTE: Removal steps in this procedure may contain installation details.
-
Recover the refrigerant. Refer to the appropriate Recovery procedure in Group 412.
-
Remove the CAC.
Refer to: Charge Air Cooler (CAC) (303-12 Intake Air Distribution and Filtering - 3.0L EcoBoost/3.0L EcoBoost – Hybrid (BQ), Removal and Installation).
-
Remove the receiver/drier cap.
.jpg) |
-
Remove the receiver/drier plug and the desiccant bag.
Use the General Equipment: Long Nose Pliers
.jpg) |
Installation
-
To install, reverse the removal procedure.
-
NOTICE: Only use the specified material to lubricate the seals.
Install and lubricate new O-ring seals. Refer to the appropriate Specifications in Group 412.
-
Lubricate the refrigerant system with the correct amount
of clean PAG oil. Refer to the appropriate Refrigerant Oil Adding
procedure in Group 412.
 Removal and Installation - Condenser Outlet Line - 3.0L EcoBoost
Removal
NOTE:
The condenser inlet and outlet line are installed as a one-piece assembly.
Remove the condenser inlet line.
Refer to: Condenser Inlet Line - 3...
 Removal and Installation - Driver Side Footwell Air Discharge Temperature Sensor
Removal
Remove the driver knee airbag.
Refer to: Driver Knee Airbag (501-20B Supplemental Restraint System, Removal and Installation).
Remove the driver side register air discharge tempreature sensor...
Other information:
Lincoln Aviator 2020-2026 Service Manual: General Procedures - Air Conditioning (A/C) System Flushing - Vehicles With: R1234YF Refrigerant
Special Tool(s) / General Equipment Air Conditioning Flush and Purge Service Unit Air Conditioning Adaptor Kit Materials Name Specification Motorcraft® A/C System Flushing SolventYN-23 - Flushing NOTICE: Use the Refrigerant Identification Equipment before recovering any of the vehicle's refrigerant...
Lincoln Aviator 2020-2026 Owners Manual: Apps
The system allows you interact with select mobile apps while keeping your eyes on the road. Voice commands, your steering wheel buttons, or a quick tap on your touchscreen give you advanced control of compatible mobile apps. You can also stream your favorite music or podcasts, share your time of arrival with friends, and keep connected safely...
Categories
- Manuals Home
- Lincoln Aviator Owners Manual
- Lincoln Aviator Service Manual
- Opening and Closing the Hood
- Anti-Theft Alarm
- Remove and Reinstall the Battery
- New on site
- Most important about car
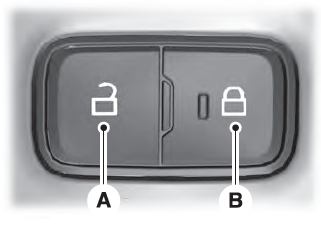
Locking and Unlocking the Doors from Inside

Locking the Doors
Press the lock switch on the door interior trim panel. The doors can no longer be released using the exterior door handle switches and the luggage compartment locks.
