Lincoln Aviator 2020-2026 Service Manual / Chassis / Driveline / Rear Drive Axle/Differential / Removal and Installation - Drive Pinion Seal
Lincoln Aviator: Rear Drive Axle/Differential / Removal and Installation - Drive Pinion Seal
Special Tool(s) / General Equipment
.jpg) |
205-1061 Installer, Pinion Seal 8.8 |
.jpg) |
205-199
(T83T-3132-A1)
Installer, Spindle/Axle Shaft T83-4000-A TKIT-1983-F TKIT-1983-FLM TKIT-1983-FX |
| Flat Headed Screw Driver | |
Materials
| Name | Specification |
|---|---|
| Motorcraft® Premium Long-Life Grease XG-1-E1 |
ESA-M1C75-B |
Removal
-
With the vehicle in NEUTRAL, position it on a hoist.
Refer to: Jacking and Lifting (100-02 Jacking and Lifting) .
-
Remove the rear driveshaft.
Refer to: Rear Driveshaft (205-01 Driveshaft, Removal and Installation).
-
Remove and discard the drive pinion seal.
Use the General Equipment: Flat Headed Screw Driver
.jpg) |
Installation
-
Lubricate the new drive pinion seal lip with grease.
Material: Motorcraft® Premium Long-Life Grease / XG-1-E1 (ESA-M1C75-B)
.jpg) |
-
Using the special tools, install the new drive pinion seal.
Use Special Service Tool: 205-1061 Installer, Pinion Seal 8.8. , 205-199 (T83T-3132-A1) Installer, Spindle/Axle Shaft.
.jpg) |
-
Install the rear driveshaft.
Refer to: Rear Driveshaft (205-01 Driveshaft, Removal and Installation).
-
Check the RDU fluid level.
Refer to: Differential Fluid Level Check (205-02 Rear Drive Axle/Differential, General Procedures).
 Removal and Installation - Differential Housing Cover
Materials
Name
Specification
Motorcraft® Ultra Silicone SealantTA-29
WSS-M4G323-A8
Removal
With the vehicle in NEUTRAL, position it on a hoist...
 Removal and Installation - Rear Halfshaft Seal
Special Tool(s) /
General Equipment
205-153
(T80T-4000-W)
Handle
307-758Installer, Axle Seal -FWD
Feeler Gauge
Flat Headed Screw Driver
Removal
NOTE:
The stub shaft seals must be replaced whenever the halfshafts are removed...
Other information:
Lincoln Aviator 2020-2026 Service Manual: Removal and Installation - Third Row Seat Backrest
Special Tool(s) / General Equipment Interior Trim Remover Removal WARNING: The following procedure describes critical repair steps required for correct seat component installation. Follow all notes and steps carefully. Do not place any objects between the seat components and the body of the vehicle, nor any objects within a joint internal to the seat structure...
Lincoln Aviator 2020-2026 Service Manual: Removal and Installation - Passenger Door Window Control Switch
Special Tool(s) / General Equipment Interior Trim Remover Removal Remove the passenger door window control switch bezel assembly. Release the locking tabs from the passenger door window control switch bezel assembly. Use the General Equipment: Interior Trim Remover Disconnect the passenger door window control switch the electrical connector...
Categories
- Manuals Home
- Lincoln Aviator Owners Manual
- Lincoln Aviator Service Manual
- Description and Operation - Body and Frame
- Body and Paint
- Configuring The Head Up Display
- New on site
- Most important about car
Activating Intelligent Access
The intelligent access key must be within 3 ft (1 m) of the door or luggage compartment you intend to lock or unlock.
At a Door
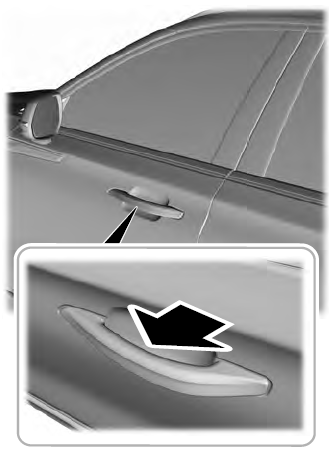
Electronic door handles are on each door. Gently depress the switch inside the exterior door handle to unlock and open the door. An unlock symbol illuminates on the door window trim indicating your vehicle is unlocked.

Copyright © 2026 www.liaviator2.com
