Lincoln Aviator: Front Drive Axle/Differential / Removal and Installation - Front Halfshaft Speed Sensor
Materials
| Name | Specification |
|---|---|
| Motorcraft® SAE 75W-140 Synthetic Rear Axle Lubricant XY-75W140-QL |
WSL-M2C192-A |
Removal
-
With the vehicle in NEUTRAL, position it on a hoist.
Refer to: Jacking and Lifting (100-02 Jacking and Lifting, Description and Operation).
-
-
Remove the pin-type retainer.
-
Remove the bolts and the radiator air deflector.
-
Remove the bolts.
-
Remove the retainers and the engine undershield.
-
Remove the pin-type retainer.
.jpg) |
-
Disconnect the front halfshaft speed sensor electrical connector.
.jpg) |
-
Remove the bolt and the front halfshaft speed sensor.
.jpg) |
-
NOTE: The O-ring seals are to be reused unless damaged.
Clean and inspect the front halfshaft speed sensor O-ring for damage and install new front halfshaft speed sensor as necessary.
.jpg) |
Installation
-
NOTE: Make sure that the mating surface and the bore is free of corrosion and foreign material, avoid particles getting into the bore.
Clean and inspect the front axle assembly at front halfshaft speed sensor mating surface.
.jpg) |
-
NOTE: Make sure that a new component is installed if the O-ring is damaged.
NOTE: Make sure the O-ring is installed correctly within the O-ring groove.
If removed, install the new front halfshaft speed sensor O-ring and lubricate them with clean front axle fluid.
Material: Motorcraft® SAE 75W-140 Synthetic Rear Axle Lubricant / XY-75W140-QL (WSL-M2C192-A)
.jpg) |
-
NOTE: The shim is to be reused with a new speed sensor unless damaged (if equipped).
Install the front halfshaft speed sensor and the bolt.
Torque: 89 lb.in (10 Nm)
.jpg) |
-
Connect the front halfshaft speed sensor electrical connector.
.jpg) |
-
Check the front differential fluid level.
Refer to: Differential Fluid Level Check (205-03 Front Drive Axle/Differential, General Procedures).
-
-
Position the engine undershield and install the pin-type retainer.
-
Install the bolts.
Torque: 22 lb.in (2.5 Nm)
-
Install the radiator air deflector and the bolts.
Torque: 22 lb.in (2.5 Nm)
-
Install the radiator air deflector retainers.
-
Position the engine undershield and install the pin-type retainer.
.jpg) |
 Removal and Installation - Drive Pinion Seal
Special Tool(s) /
General Equipment
205-1065Installer, Pinion Seal
205-199
(T83T-3132-A1)
Installer, Spindle/Axle ShaftT83-4000-ATKIT-1983-FTKIT-1983-FLMTKIT-1983-FX
Flat Headed Screw Driver
Materials
Name
Specification
Motorcraft® High Temperature 4x4 Front Axle and Wheel Bearing GreaseXG-11
WSS-M1C267-A1
Removal
Remove the front driveshaft...
Other information:
Lincoln Aviator 2020-2026 Service Manual: Description and Operation - Transfer Case - Overview
Authoring Template Transfer case The Transfer Case is a gearbox that attaches to the output shaft of the transmission through a splined input at the transfer case. Torque from the transmission is transferred to the rear driveshaft through the transfer case mainshaft...
Lincoln Aviator 2020-2026 Service Manual: Description and Operation - Main Control Valve Body
Item Description 1 Internal wiring harness retaining bolt 2 Internal wiring harness 3 Park lock pawl solenoid 4 Solenoid retaining plate bolts 5 Solenoid retaining plate 6 TCC solenoid 7 LPC solenoid 8 Shift solenoid retaining plate bolts 9 Shift solenoid retaining plate 10 SSD 11 SSE 12 SSB 13 SSC 14 SSF 15 SSA 16 TFT 17 Valve channel plate bolts 18 Valve channel plate 19 Lower-to-upper valve body bolts 20 Lower valve body 21 Upper valve body 22 Valve body dowel pins Lower Valve Body 1 Valve body separator plate bolts 2 Valve body separator plate 3 TCC damper 4 LPC damper assembly 5 Check valve assemblies 6 Check balls (quantity 5) 7 LPC anti-backflow valve assembly 8 TCC priority valve assembly 9 Park lock pawl valve 10 A clutch control valve 11 SSA 12 F clutch control valve 13 SSF 14 C clutch control valve 15 SSC 16 B clutch control valve 17 SSB 18 E clutch control valve 19 SSE 20 D clutch control valve 21 SSD 22 Shift solenoid retainers Upper Valve Body 1 Lube control valve assembly 2 Plug and spring assembly 3 C clutch latch valve assembly 4 B clutch latch valve assembly 5 F clutch latch valve assembly 6 A clutch latch valve assembly 7 Plug and spring assembly 8 TCC regulator valve assembly 9 Main regulator valve assembly The main control consists of a upper and lower valve body with solenoids that are controlled by a remote mounted TCM or the PCM...
Categories
- Manuals Home
- Lincoln Aviator Owners Manual
- Lincoln Aviator Service Manual
- Description and Operation - Jacking and Lifting
- Garage Door Opener
- Drive Modes
- New on site
- Most important about car
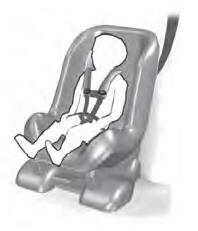
Child Seats

Use a child restraint (sometimes called an infant carrier, convertible seat, or toddler seat) for infants, toddlers and children weighing 40 lb (18 kg) or less (generally four-years-old or younger).
Using Lap and Shoulder Belts
WARNING: Do not place a rearward facing child restraint in front of an active airbag. Failure to follow this instruction could result in personal injury or death.

