Lincoln Aviator 2020-2026 Service Manual / Body and Paint / Body and Paint / Front Seats / Removal and Installation - Front Head Restraint Guide Sleeve
Lincoln Aviator: Front Seats / Removal and Installation - Front Head Restraint Guide Sleeve
Removal
NOTE: Driver seat shown, passenger seat similar.
-
Remove the front seat.
Refer to: Front Seat (501-10A Front Seats, Removal and Installation).
-
Remove the front seat backrest panel.
Refer to: Front Seat Backrest Panel (501-10A Front Seats, Removal and Installation).
Seats with power head restraint
-
Remove the front head restraint.
Refer to: Front Head Restraint (501-10A Front Seats, Removal and Installation).
-
Detach the power head restraint electrical connector.
-
Release the LH head restraint guide sleeve locking tab.
-
Slide the LH head restraint guide sleeve up.
-
On both sides.
Release the locking tabs.
-
Slide the power head restraint electrical connector down.
-
Release the LH head restraint guide sleeve locking tab.
.jpg) |
-
NOTE: Do not reuse the head restraint guide sleeves.
Remove and discard the power head restraint guide sleeves.
-
Remove and discard the LH power head restraint guide sleeve.
-
Release the RH power head restraint guide sleeve locking tab.
-
Remove and discard the RH power head restraint guide sleeve.
-
Remove and discard the LH power head restraint guide sleeve.
.jpg) |
Seats with manual head restraint
-
Depress the locking tabs and remove the manual head restraint.
.jpg) |
-
NOTE: Do not reuse the head restraint guide sleeves.
Remove and discard the manual head restraint guide sleeves.
-
Release the locking tabs.
-
Remove and discard the manual head restraint guide sleeves.
-
Release the locking tabs.
.jpg) |
Installation
NOTICE: Always install new head restraint guide sleeves. Difficult adjustment of the head restraint may occur. Failure to follow these instructions may result in component failure.
NOTICE: The head restraint guide sleeves are not interchangeable. Failure to install the correct head restraint guide sleeves at the correct position may result in component failure.
-
To install, reverse the removal procedure.
 Removal and Installation - Front Head Restraint
Removal
NOTE:
This procedure is for vehicles equipped with power head restraint only.
NOTE:
Drivers seat shown, passenger seat similar.
Remove the front seat...
 Removal and Installation - Front Seat
Removal
WARNING:
The following procedure describes critical repair steps
required for correct seat component installation. Follow all notes and
steps carefully...
Other information:
Lincoln Aviator 2020-2026 Service Manual: Removal and Installation - Axle Assembly
Special Tool(s) / General Equipment Transmission Jack Removal NOTE: Removal steps in this procedure may contain installation details. Drain the rear differential fluid. Refer to: Differential Draining and Filling (205-02 Rear Drive Axle/Differential, General Procedures)...
Lincoln Aviator 2020-2026 Service Manual: Removal and Installation - Front Seat Cushion Cover - Vehicles With: Multi-Contour Seats
Removal Passenger seat Remove the OCS. Refer to: Occupant Classification System (OCS) Sensor - Vehicles With: Multi-Contour Seats (501-20B Supplemental Restraint System, Removal and Installation). Driver seat NOTE: Driver seat with power head restraint shown, other seats similar...
Categories
- Manuals Home
- Lincoln Aviator Owners Manual
- Lincoln Aviator Service Manual
- Description and Operation - Jacking and Lifting
- Fuel Quality
- Garage Door Opener
- New on site
- Most important about car
Fastening the Seatbelts
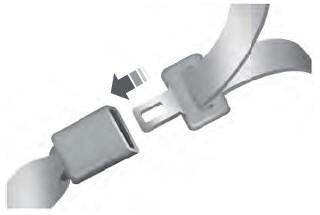
The front outboard and rear safety restraints in the vehicle are combination lap and shoulder belts.
Insert the belt tongue into the proper buckle (the buckle closest to the direction the tongue is coming from) until you hear a snap and feel it latch. Make sure that you securely fasten the tongue in the buckle.
Copyright © 2026 www.liaviator2.com
