Lincoln Aviator: Front Seats / Removal and Installation - Front Seat Cushion Cover - Vehicles With: Multi-Contour Seats
Removal
Passenger seat
-
Remove the OCS.
Refer to: Occupant Classification System (OCS) Sensor - Vehicles With: Multi-Contour Seats (501-20B Supplemental Restraint System, Removal and Installation).
Driver seat
-
NOTE: Driver seat with power head restraint shown, other seats similar.
Raise and extend the leg extensions to ease retainer access.
.jpg) |
-
Remove the front seat.
Refer to: Front Seat (501-10A Front Seats, Removal and Installation).
-
Disconnect the front seat cushion heater mat electrical connector and position aside.
.jpg) |
-
Detach the cushion cover J-clips from the seat cushion extensions.
.jpg) |
-
Remove the front seat backrest panel.
Refer to: Front Seat Backrest Panel (501-10A Front Seats, Removal and Installation).
-
NOTE: After disconnecting the hose and lock assemblies, verify the black O-ring and white spacer remains with each hose.
NOTE: When connecting the hose and lock assemblies, an audible click must be heard for correct installation.
Detach the multi-contour seat cushion hose retainers, release the locking tab, disconnect the hose and lock assembly from the SCMG and route the hose assembly out from the backrest.
.jpg) |
-
At the attachment points, slide the seat cushion
assembly rearward and upward, detaching the cushion assembly from the
cushion module.
.jpg) |
-
-
NOTE: Only the carrier portion of the seat cushion is shown.
Push the rear of the seat cushion up, disengaging the carrier from the locator pins.
-
Pull the seat cushion out from between the seat track and backrest.
-
.jpg) |
-
NOTE: For correct installation, note the location of the cushion heater mat wiring harness pigtail as it passes through the seat.
Remove the front seat cushion foam and cover as an assembly.
-
Pull the front seat cushion cover, foam and
heater mat pigtail out from between the seat track and backrest.
-
Pull the front seat cushion cover, foam and
heater mat pigtail out from between the seat track and backrest.
.jpg) |
All seats
-
NOTE: This step is only necessary when installing a new component.
Release the front seat cushion cover from the retainers.
.jpg) |
-
NOTE: This step is only necessary when installing a new component.
Release the front seat backrest cover tabs.
.jpg) |
-
NOTE: This step is only necessary when installing a new component.
Release the hook-and-arrows and remove the front seat cushion cover carrier.
.jpg) |
-
NOTICE: Use care when separating the seat cushion cover from the hook-and-loop strips or the hook-and-loop strips may be torn from the seat cushion foam.
NOTE: This step is only necessary when installing a new component.
Remove the front seat cushion cover.
-
Invert the seat cushion cover.
-
Release the hook-and-loop strips.
-
Invert the seat cushion cover.
.jpg) |
Installation
-
To install, reverse the removal procedure.
 Removal and Installation - Front Seat Cushion Cover - Vehicles Without: Multi-Contour Seats
Removal
Passenger seat
Remove the OCS.
Refer to: Occupant Classification System (OCS) Sensor - Vehicles Without: Multi-Contour Seats (501-20B Supplemental Restraint System, Removal and Installation)...
 Removal and Installation - Front Seat Cushion Extension Adjuster
Removal
NOTE:
Removal steps in this procedure may contain installation details.
NOTE:
Driver seat with power head restraint shown, other seats similar...
Other information:
Lincoln Aviator 2020-2025 Service Manual: Description and Operation - Information and Entertainment System - Overview
Audio System NOTE: Refer to the Owner Literature for additional details of the audio system. AM/ FM Radio The ACM can operate when the ignition is on or off. The accessory delay feature powers the audio system, after the ignition has been turned off, for a preset time or until a front door is opened...
Lincoln Aviator 2020-2025 Service Manual: Removal and Installation - Rear Evaporator
Removal NOTE: Removal steps in this procedure may contain installation details. Remove the rear climate control housing. Refer to: Rear Climate Control Housing (412-02A Rear Climate Control, Removal and Installation). NOTE: Replace the pass-through floor seal with new if seal is removed or damaged...
Categories
- Manuals Home
- Lincoln Aviator Owners Manual
- Lincoln Aviator Service Manual
- Locking and Unlocking
- Child Safety Locks
- Configuring The Head Up Display
- New on site
- Most important about car
Activating Intelligent Access
The intelligent access key must be within 3 ft (1 m) of the door or luggage compartment you intend to lock or unlock.
At a Door
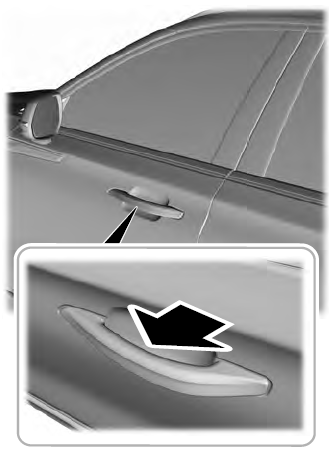
Electronic door handles are on each door. Gently depress the switch inside the exterior door handle to unlock and open the door. An unlock symbol illuminates on the door window trim indicating your vehicle is unlocked.

