Lincoln Aviator: Climate Control System - General Information / Removal and Installation - Air Conditioning (A/C) Compressor Outlet Line - 3.0L EcoBoost
Removal
NOTICE: During the removal of components, cap, tape or otherwise appropriately protect all openings to prevent the ingress of dirt or other contamination. Remove protective materials prior to installation.
NOTE: Removal steps in this procedure may contain installation details.
-
Recover the refrigerant. Refer to the appropriate Recovery procedure in Group 412.
-
Remove the bolts and the suspension support bar.
Torque: 22 lb.ft (30 Nm)
.jpg) |
-
Remove the PCM.
Refer to: Powertrain Control Module (PCM) (303-14A Electronic Engine Controls - 3.0L EcoBoost/3.0L EcoBoost – Hybrid (BQ), Removal and Installation).
-
Disconnect the harness retainers. Remove the bolts and the PCM mounting bracket.
Torque: 55 lb.in (6.2 Nm)
.jpg) |
-
Remove the RH upper air cleaner outlet pipe.
Refer to: Air Cleaner Outlet Pipe RH (303-12 Intake Air Distribution and Filtering - 3.0L EcoBoost/3.0L EcoBoost – Hybrid (BQ), Removal and Installation).
-
Remove the RH
CAC intake pipe.
Refer to: Charge Air Cooler (CAC) Intake Pipe (303-12 Intake Air Distribution and Filtering - 3.0L EcoBoost/3.0L EcoBoost – Hybrid (BQ), Removal and Installation).
-
Remove the retainer and disconnect the A/C compressor outlet line.
-
Make sure to cover any open ports to prevent debris from entering the system.
Torque: 159 lb.in (18 Nm)
-
Make sure to cover any open ports to prevent debris from entering the system.
.jpg) |
-
-
Disconnect the A/C pressure transducer connector.
-
Remove the retainer and the A/C compressor outlet line.
Torque: 159 lb.in (18 Nm)
-
Make sure to cover any open ports to prevent debris from entering the system.
-
Disconnect the A/C pressure transducer connector.
.jpg) |
Installation
-
To install, reverse the removal procedure.
-
NOTICE: Only use the specified material to lubricate the seals.
Install and lubricate new O-ring seals. Refer to the appropriate Specifications in Group 412.
-
Lubricate the refrigerant system with the correct amount
of clean PAG oil. Refer to the appropriate Refrigerant Oil Adding
procedure in Group 412.
 Removal and Installation - Air Conditioning (A/C) Compressor Inlet Line - 3.0L EcoBoost
Removal
NOTICE:
During the removal of components, cap, tape or otherwise
appropriately protect all openings to prevent the ingress of dirt or
other contamination...
 Removal and Installation - Air Conditioning (A/C) Pressure Transducer - 3.0L EcoBoost
Removal
NOTE:
Removal steps in this procedure may contain installation details.
Disconnect the electrical connector and remove the A/C pressure transducer...
Other information:
Lincoln Aviator 2020-2025 Service Manual: Removal and Installation - Driver Multi-Contour Seat Module [SCMG]
Removal NOTE: Removal steps in this procedure may contain installation details. NOTE: Drivers seat SCMG (driver multi-contour seat module) shown, passenger seat SCMH (passenger multi-contour seat module) similar. NOTE: This step is only necessary when installing a new component...
Lincoln Aviator 2020-2025 Service Manual: Removal and Installation - Battery Current Sensor
Removal NOTE: Removal steps in this procedure may contain installation details. Position the rear compartment storage cover upward. Remove the rear compartment filler trim panel. Remove the rear compartment storage/cupholder assembly...
Categories
- Manuals Home
- Lincoln Aviator Owners Manual
- Lincoln Aviator Service Manual
- Anti-Theft Alarm
- Tire Change Procedure
- Locking and Unlocking
- New on site
- Most important about car
Child Seats

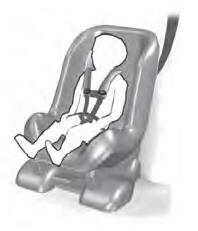
Use a child restraint (sometimes called an infant carrier, convertible seat, or toddler seat) for infants, toddlers and children weighing 40 lb (18 kg) or less (generally four-years-old or younger).
Using Lap and Shoulder Belts
WARNING: Do not place a rearward facing child restraint in front of an active airbag. Failure to follow this instruction could result in personal injury or death.
