Lincoln Aviator 2020-2026 Service Manual / Powertrain / Engine / Engine - 3.0L EcoBoost / Removal and Installation - Crankshaft Front Seal
Lincoln Aviator: Engine - 3.0L EcoBoost / Removal and Installation - Crankshaft Front Seal
Special Tool(s) / General Equipment
.jpg) |
303-1531 Installer, Front Crank Seal and Damper |
.jpg) |
303-335
(T88T-6701-A)
Installer, Front Cover Oil Seal TKIT-1988-FLM TKIT-1988-F |
.jpg) |
303-409
(T92C-6700-CH)
Remover, Crankshaft Seal TKIT-1992-FH/FMH/FLMH TKIT-1993-LMH/MH |
Removal
-
Remove the crankshaft pulley.
Refer to: Crankshaft Pulley (303-01A Engine - 3.0L EcoBoost, Removal and Installation).
-
NOTICE: Use care not to damage the engine front cover or the crankshaft when removing the seal.
-
Install the crankshaft pulley bolt.
-
Using the special tool, remove and discard the crankshaft front oil seal.
Use Special Service Tool: 303-409 (T92C-6700-CH) Remover, Crankshaft Seal.
-
NOTE: If further disassembly of the engine will be performed, retain the original crankshaft pulley bolt for turning the crankshaft while the pulley is removed.
Remove and discard the crankshaft pulley bolt.
-
Install the crankshaft pulley bolt.
.jpg) |
Installation
-
Lubricate the engine front cover bore with clean engine oil.
.jpg) |
-
Using the special tools, install the new crankshaft front oil seal.
Use Special Service Tool: 303-335 (T88T-6701-A) Installer, Front Cover Oil Seal. , 303-1531 Installer, Front Crank Seal and Damper.
.jpg) |
-
Install the crankshaft pulley.
Refer to: Crankshaft Pulley (303-01A Engine - 3.0L EcoBoost, Removal and Installation).
 Removal and Installation - Camshaft Roller Follower
Special Tool(s) /
General Equipment
303-1633Remover, Roller Rocker FollowerTKIT-2014D-ROW3TKIT-2014D-FL_ROW
Removal
NOTICE:
During engine repair procedures, cleanliness is extremely
important...
 Removal and Installation - Crankshaft Pulley
Special Tool(s) /
General Equipment
303-1531Installer, Front Crank Seal and Damper
303-335
(T88T-6701-A)
Installer, Front Cover Oil SealTKIT-1988-FLMTKIT-1988-F
Three Leg Puller
Removal
NOTICE:
During engine repair procedures, cleanliness is extremely
important...
Other information:
Lincoln Aviator 2020-2026 Service Manual: Removal and Installation - Instrument Panel Center Speaker
Removal NOTE: Removal steps in this procedure may contain installation details. Release the clips and remove the instrument panel center speaker grille. Vehicles equipped with 14 speaker audio system Remove the screws, disconnect the electrical connector and remove the instrument panel center speaker...
Lincoln Aviator 2020-2026 Owners Manual: Air Conditioning System
WARNING: The air conditioning refrigerant system contains refrigerant under high pressure. Only qualified personnel should service the air conditioning refrigerant system. Opening the air conditioning refrigerant system can cause personal injury...
Categories
- Manuals Home
- Lincoln Aviator Owners Manual
- Lincoln Aviator Service Manual
- Body and Paint
- Opening and Closing the Hood
- Wireless Accessory Charger (If Equipped)
- New on site
- Most important about car
Activating Intelligent Access
The intelligent access key must be within 3 ft (1 m) of the door or luggage compartment you intend to lock or unlock.
At a Door
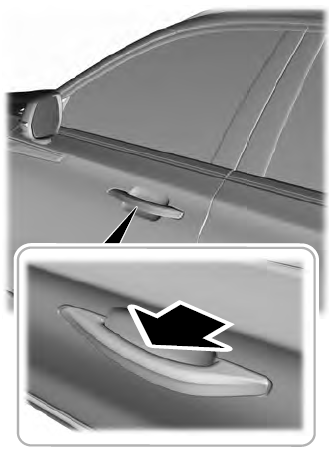
Electronic door handles are on each door. Gently depress the switch inside the exterior door handle to unlock and open the door. An unlock symbol illuminates on the door window trim indicating your vehicle is unlocked.

Copyright © 2026 www.liaviator2.com
