Lincoln Aviator: Glass, Frames and Mechanisms / Removal and Installation - Front Door Window Regulator and Motor
Special Tool(s) / General Equipment
| Punch |
Removal
NOTE: Left hand (LH) shown, right hand (RH) similar.
NOTE: For front door window regulator motors that are non-functional it will be necessary to remove the front door window regulator motor prior to removing the front door window regulator.
NOTE: Removal steps in this procedure may contain installation details.
-
Remove the front door trim panel.
Refer to: Front Door Trim Panel (501-05 Interior Trim and Ornamentation, Removal and Installation).
-
Remove the front door window glass release access covers.
.jpg) |
-
Lower the front door window glass to the half down position.
-
Connect the window control switch.
-
Lower the front door window glass to the half down position.
-
Disconnect the window control switch.
-
Connect the window control switch.
.jpg) |
-
Release the front door window glass and tape in the full up position.
-
Release the front door window glass retaining clips.
Use the General Equipment: Punch
-
Raise the front door window glass in the full up position.
-
Tape the front door window glass in the full up position.
-
Release the front door window glass retaining clips.
.jpg) |
-
Position the front door wiring harness aside.
-
Disconnect the exterior mirror electrical connectors.
-
Disconnect the front door speaker electrical connector..
-
Disconnect the DDM electrical connectors.
-
Disconnect the front door window regulator motor electrical connector.
-
Release the front door wiring harness routing clips and position the front door wiring harness aside.
-
Disconnect the exterior mirror electrical connectors.
.jpg) |
-
Remove the front door window regulator nut adhesive covers.
.jpg) |
-
NOTE: Follow the unique instructions or graphic for this step in installation
Loosen the front door window regulator nuts.
Torque: 71 lb.in (8 Nm)
.jpg) |
-
NOTE: Follow the unique instructions or graphic for this step in installation
Remove the front door window regulator and motor.
-
Release the front door window regulator retaining clips.
Torque: 49 lb.in (5.5 Nm)
-
Position the front door window regulator retaining clips into the service position.
-
Release the front door window regulator retaining clips.
.jpg) |
-
NOTE: This step is only necessary when installing a new component.
Remove the screws and the DDM.
.jpg) |
-
NOTE: This step is only necessary when installing a new component.
Remove the front door window regulator motor.
-
Remove the front door window regulator bolts.
-
Remove the front door window regulator motor.
-
Remove the front door window regulator bolts.
.jpg) |
-
NOTE: This step is only necessary when installing a new component.
Remove the front door woofer speaker.
-
Remove the screws.
Torque: 22 lb.in (2.5 Nm)
-
Remove the front door woofer speaker.
-
Remove the screws.
.jpg) |
Installation
-
To install, reverse the removal procedure.
-
Torque the retainers and nuts in the sequence shown.
-
Torque the retainers in the sequence shown.
Torque: 49 lb.in (5.5 Nm)
-
Torque the nuts in the sequence shown.
Torque: 71 lb.in (8 Nm)
-
Torque the retainers in the sequence shown.
.jpg) |
-
Carry out the power door window initialization.
Refer to: Power Door Window Initialization (501-11 Glass, Frames and Mechanisms, General Procedures).
 Removal and Installation - Front Door Window Glass
Removal
NOTE:
LH (left-hand) side shown, RH (right-hand) side similar.
Remove the front door window regulator and motor.
Refer to: Front Door Window Regulator and Motor (501-11 Glass, Frames and Mechanisms, Removal and Installation)...
 Removal and Installation - Front Door Window Regulator Motor
Removal
NOTE:
Left hand (LH) shown, right hand (RH) similar.
NOTE:
For front door window regulator motors that are
non-functional it may be necessary to remove the front door window
regulator motor prior to securing the front door window glass...
Other information:
Lincoln Aviator 2020-2026 Service Manual: Removal and Installation - Windshield Wiper Motor
Removal NOTE: Removal steps in this procedure may contain installation details. Remove the wiper linkage assembly. Refer to: Wiper Linkage Assembly (501-16 Wipers and Washers, Removal and Installation). NOTICE: Be careful not to damage the link seals during removal...
Lincoln Aviator 2020-2026 Owners Manual: Opening the Luggage Compartment
From Inside Your Vehicle With the transmission in park (P), press the button on the instrument panel. With the Remote Control Press twice within three seconds to open the luggage compartment. From Outside Your Vehicle Press the exterior release button...
Categories
- Manuals Home
- Lincoln Aviator Owners Manual
- Lincoln Aviator Service Manual
- Changing the Front Wiper Blades - Vehicles With: Heated Wiper Blades
- Locking and Unlocking
- USB Port and Power Point Locations
- New on site
- Most important about car
Activating Intelligent Access
The intelligent access key must be within 3 ft (1 m) of the door or luggage compartment you intend to lock or unlock.
At a Door
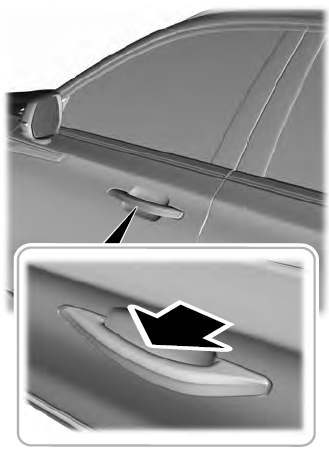
Electronic door handles are on each door. Gently depress the switch inside the exterior door handle to unlock and open the door. An unlock symbol illuminates on the door window trim indicating your vehicle is unlocked.

