Lincoln Aviator 2020-2026 Service Manual / Powertrain / Fuel System - General Information / Fuel Tank and Lines - 3.0L EcoBoost / Removal and Installation - Fuel Tank Filler Pipe
Lincoln Aviator: Fuel Tank and Lines - 3.0L EcoBoost / Removal and Installation - Fuel Tank Filler Pipe
Removal
NOTE: Removal steps in this procedure may contain installation steps.
-
Disconnect the battery.
Refer to: Battery Disconnect and Connect (414-01 Battery, Mounting and Cables, General Procedures).
-
With the vehicle in NEUTRAL, position it on a hoist.
Refer to: Jacking and Lifting (100-02 Jacking and Lifting, Description and Operation).
-
Remove the LHR wheel and tire.
Refer to: Wheel and Tire (204-04A Wheels and Tires, Removal and Installation).
-
-
Remove the nuts.
Torque: 22 lb.in (2.5 Nm)
-
Remove the screws.
Torque: 13 lb.in (1.5 Nm)
-
Remove the bolt.
Torque: 89 lb.in (10 Nm)
-
Remove the LHR wheel liner.
-
Remove the nuts.
.jpg) |
-
Loosen both clamps and remove the hose.
Torque: 28 lb.in (3.2 Nm)
.jpg) |
-
-
Remove the quick release couplings.
Refer to: Quick Release Coupling (310-00A Fuel System - General Information - 3.0L EcoBoost, General Procedures).
-
Remove the quick release couplings.
.jpg) |
-
-
Detach the clip and position the drain hose aside.
-
Remove and dicard the bolts.
Torque: 80 lb.in (9 Nm)
-
Detach the clip and position the drain hose aside.
.jpg) |
-
-
Detach the clip.
-
Remove bolts and position aside the brake hose.
Torque: 71 lb.in (8 Nm)
-
Detach the clip.
.jpg) |
-
Remove and Discard the Fuel Filler Door Assembly.
Refer to: Fuel Filler Door Assembly (501-03 Body Closures, Removal and Installation).
-
Remove wheel hub nut.
Refer to: Wheel Bearing and Wheel Hub (204-02 Rear Suspension, Removal and Installation).
-
-
Support the lower control arm using a jack stand.
-
Remove and discard the upper control arm outer bolt and nut.
Torque: 76 lb.ft (103 Nm)
-
Support the lower control arm using a jack stand.
.jpg) |
-
Remove and discard the lower arm vertical link upper
bolt and position aside the knuckle to allow room to remove the fuel
filler pipe.
Torque: 76 lb.ft (103 Nm)
.jpg) |
-
Remove the fuel filler pipe by pulling up on the pipe
through the fuel filler door assembly hole and swinging the bottom of
the fuel filler pipe past the subframe.
.jpg) |
Installation
-
To install, reverse the removal procedure.
 Removal and Installation - Fuel Pump and Sender Unit
Special Tool(s) /
General Equipment
310-123Locking Ring, Fuel TankTKIT-2004J-FTKIT-2005U-LM
Removal
WARNING:
Do not smoke, carry lighted tobacco or have an open flame of
any type when working on or near any fuel-related component...
 Removal and Installation - Fuel Tank
Special Tool(s) /
General Equipment
Transmission Jack
Removal
NOTE:
Removal steps in this procedure may contain installation steps.
Release the fuel system pressure...
Other information:
Lincoln Aviator 2020-2026 Service Manual: Removal and Installation - Instrument Panel Cluster (IPC)
Special Tool(s) / General Equipment Interior Trim Remover Removal NOTE: Removal steps in this procedure may contain installation details. NOTE: If installing a new module, it is necessary to upload the module configuration information to the scan tool prior to removing the module...
Lincoln Aviator 2020-2026 Service Manual: Removal and Installation - Windshield Washer Reservoir
Special Tool(s) / General Equipment Fluid Suction Gun Fluid Container Materials Name Specification Motorcraft® Premium Windshield Wash Concentrate with BitterantZC-32-B2 WSS-M14P19-A Removal NOTE: Removal steps in this procedure may contain installation details...
Categories
- Manuals Home
- Lincoln Aviator Owners Manual
- Lincoln Aviator Service Manual
- Description and Operation - Jacking and Lifting
- Wireless Accessory Charger (If Equipped)
- Resetting the System
- New on site
- Most important about car
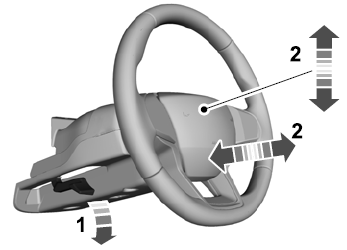
Adjusting the Steering Wheel - Vehicles With: Manual Adjustable Steering Column
WARNING: Do not adjust the steering wheel when your vehicle is moving.
Note: Make sure that you are sitting in the correct position.
Unlock the steering column. Adjust the steering wheel to the desired position.
Copyright © 2026 www.liaviator2.com
