Lincoln Aviator 2020-2026 Service Manual / Chassis / Brake System / Hydraulic Brake Actuation / Removal and Installation - Remote Brake Fluid Reservoir
Lincoln Aviator: Hydraulic Brake Actuation / Removal and Installation - Remote Brake Fluid Reservoir
Removal
NOTICE: Siphon the brake fluid from the HCU/EBB reservoir, if the reservoir is not emptied there will be a large amount of brake fluid spilled in the engine compartment.
NOTE: Removal steps in this procedure may contain installation details.
-
Remove the cowl panel grille.
Refer to: Cowl Panel Grille (501-02 Front End Body Panels, Removal and Installation).
-
Release the tabs and remove the BCMC cover.
.jpg) |
-
-
Remove the nut and position aside the cable aside.
Torque: 106 lb.in (12 Nm)
-
Fully loosen the BCMC connector bolts.
Torque: 48 lb.in (5.4 Nm)
-
Remove the nut and position aside the cable aside.
.jpg) |
-
Release the tabs and remove the BCMC.
.jpg) |
-
Remove the bolts, detach the wiring retainers and then remove the BCMC support bracket.
Torque: 106 lb.in (12 Nm)
.jpg) |
-
NOTICE: If the brake fluid is spilled on any component, the affected area must be immediately washed down with cold water.
NOTE: Be prepared to collect escaping fluid.
Disconnect the remote brake fluid reservoir tube and drain the fluid into a suitable container.
.jpg) |
-
Remove the 2 bolts and the remote brake fluid reservoir.
Torque: 25 lb.in (2.8 Nm)
.jpg) |
Installation
-
To install, reverse the removal procedure.
-
Remove the remote brake fluid reservoir cap.
.jpg) |
-
If provided with the service kit.
Replace the translation label.
.jpg) |
-
Fill the reservoir with clean, specified brake fluid.
Refer to: Specifications (206-00 Brake System - General Information, Specifications).
.jpg) |
 Removal and Installation - Brake Pedal and Bracket
Removal
NOTE:
Removal steps in this procedure may contain installation details.
Remove the BCM.
Refer to: Body Control Module (BCM) (419-10 Multifunction Electronic Modules, Removal and Installation)...
Other information:
Lincoln Aviator 2020-2026 Service Manual: Removal and Installation - Headliner - Lowering
Special Tool(s) / General Equipment Pick Hook Interior Trim Remover Remove the following items: On both sides. Remove the A-pillar trim panel. Refer to: A-Pillar Trim Panel (501-05 Interior Trim and Ornamentation, Removal and Installation)...
Lincoln Aviator 2020-2026 Owners Manual: Reverse Braking Assist
What Is Reverse Braking Assist The system is designed to reduce impact damage or avoid a collision completely by using the sensors on the rear of your vehicle. The system functions when in reverse (R) and traveling at a speed of 1–7 mph (1.5–12 km/h)...
Categories
- Manuals Home
- Lincoln Aviator Owners Manual
- Lincoln Aviator Service Manual
- USB Port and Power Point Locations
- Description and Operation - Body and Frame
- Child Safety Locks
- New on site
- Most important about car
Locking and Unlocking the Doors from Inside

Locking the Doors
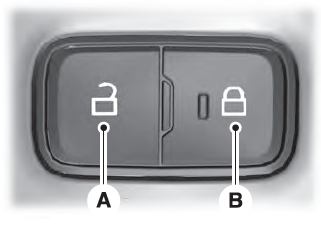
Press the lock switch on the door interior trim panel. The doors can no longer be released using the exterior door handle switches and the luggage compartment locks.
Copyright © 2026 www.liaviator2.com

