Lincoln Aviator: Third Row Seats / Removal and Installation - Third Row Seat Backrest
Special Tool(s) / General Equipment
| Interior Trim Remover |
Removal
.jpg) WARNING:
The following procedure describes critical repair steps
required for correct seat component installation. Follow all notes and
steps carefully. Do not place any objects between the seat components
and the body of the vehicle, nor any objects within a joint internal to
the seat structure. Failure to follow step instructions may result in
incorrect operation of the seat components and increases the risk of
serious personal injury.
WARNING:
The following procedure describes critical repair steps
required for correct seat component installation. Follow all notes and
steps carefully. Do not place any objects between the seat components
and the body of the vehicle, nor any objects within a joint internal to
the seat structure. Failure to follow step instructions may result in
incorrect operation of the seat components and increases the risk of
serious personal injury.
NOTE: Removal steps in this procedure may contain installation details.
-
Remove the third row seat cushion.
Refer to: Third Row Seat Cushion (501-10C Third Row Seats, Removal and Installation).
-
Remove the luggage compartment floor covering.
.jpg) |
-
Remove the luggage compartment spare tire cover.
.jpg) |
-
NOTE: LH (left hand) shown, RH (right hand) similar.
On both sides.
Release the clips and remove the luggage compartment side trim panel.
Use the General Equipment: Interior Trim Remover
.jpg) |
-
Disconnect the third row seat backrest electrical connector.
.jpg) |
-
Remove the third row seat backrest LH bolts and position aside the seatbelt.
Torque: 41 lb.ft (55 Nm)
.jpg) |
-
Remove the third row seat backrest RH bolts and position aside the seatbelt.
Torque: 41 lb.ft (55 Nm)
.jpg) |
-
Remove the third row seat backrest.
.jpg) |
Installation
NOTE: During installation, make sure the seatbelt webbing is not twisted and the seatbelts and buckles are accessible to the occupants.
-
To install, reverse the removal procedure.
-
Check the seatbelt system for correct operation.
Refer to: Seatbelt Systems (501-20A Seatbelt Systems, Diagnosis and Testing).
 Removal and Installation - Power Fold Seat Module [SCMJ]
Removal
NOTE:
Removal steps in this procedure may contain installation details.
NOTE:
The SCMJ (power fold seat module) is located under the LH (left-hand) second row seat cushion frame...
 Removal and Installation - Third Row Seat Backrest Cover
Special Tool(s) /
General Equipment
Flat-Bladed Screwdriver
Interior Trim Remover
Removal
NOTE:
LH (left hand) shown, RH (right hand) similar...
Other information:
Lincoln Aviator 2020-2026 Service Manual: Removal and Installation - Fender Splash Shield
Removal NOTE: Removal steps in this procedure may contain installation details. NOTE: LH side shown, RH side similar. Remove the wheel and tire. Refer to: Wheel and Tire (204-04A Wheels and Tires, Removal and Installation). Remove the front fender moulding...
Lincoln Aviator 2020-2026 Service Manual: Removal and Installation - Variable Camshaft Timing (VCT) Unit
Special Tool(s) / General Equipment 303-1248Camshaft holding toolsTKIT-2006UF-FLMTKIT-2006UF-ROW 303-1696Camshaft holding fixture Removal NOTICE: During engine repair procedures, cleanliness is extremely important. Any foreign material, including any material created while cleaning gasket surfaces, that enters the oil passages, coolant passages or the oil pan, can cause engine failure...
Categories
- Manuals Home
- Lincoln Aviator Owners Manual
- Lincoln Aviator Service Manual
- Interior Lamps
- Fuel Quality
- Changing the Front Wiper Blades - Vehicles With: Heated Wiper Blades
- New on site
- Most important about car
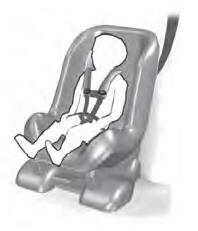
Child Seats

Use a child restraint (sometimes called an infant carrier, convertible seat, or toddler seat) for infants, toddlers and children weighing 40 lb (18 kg) or less (generally four-years-old or younger).
Using Lap and Shoulder Belts
WARNING: Do not place a rearward facing child restraint in front of an active airbag. Failure to follow this instruction could result in personal injury or death.
