Lincoln Aviator 2020-2026 Service Manual / Electrical / Instrumentation and Warning Systems / Parking Aid - Vehicles With: Rear Parking Aid / Removal and Installation - Rear Parking Aid Sensor
Lincoln Aviator: Parking Aid - Vehicles With: Rear Parking Aid / Removal and Installation - Rear Parking Aid Sensor
Removal
-
Remove the rear bumper cover.
Refer to: Rear Bumper Cover (501-19 Bumpers, Removal and Installation).
-
If equipped.
Position aside the connector shield.
.jpg) |
-
Remove the rear parking aid sensor.
-
Disconnect the electrical sensor.
-
Release the tabs.
-
Remove the sensor.
-
Disconnect the electrical sensor.
.jpg) |
Installation
NOTE: Make sure that the isolator rings are installed correctly while installing the sensors.
-
To install, reverse the removal procedure.
-
Carry out the azimuth system check.
Refer to: Azimuth System Check (413-13A Parking Aid - Vehicles With: Rear Parking Aid, General Procedures).
-
Carry out the elevation system check.
Refer to: Elevation System Check (413-13A Parking Aid - Vehicles With: Rear Parking Aid, General Procedures).
-
If any sensor fails the checks, diagnose the sensor fault.
Refer to: Parking Aid (413-13C Parking Aid - Vehicles With: Active Park Assist, Diagnosis and Testing).
 Removal and Installation - Parking Assist Control Module (PAM)
Removal
NOTE:
If installing a new PAM,
it is necessary to upload the module configuration information to the
scan tool prior to removing the module...
Other information:
Lincoln Aviator 2020-2026 Service Manual: Removal and Installation - Second Row Single Seat Backrest Cover - Vehicles With: Second Row Captain Chairs
Special Tool(s) / General Equipment Interior Trim Remover Removal NOTE: LH (left hand) seat shown, RH (right hand) seat similar. Remove the second row seat. Refer to: Second Row Seat - Vehicles With: Second Row Captain Chairs (501-10B Second Row Seats, Removal and Installation)...
Lincoln Aviator 2020-2026 Service Manual: Removal and Installation - Active Noise Control Microphone
Removal Lower the headliner. Refer to: Headliner - Lowering (501-05 Interior Trim and Ornamentation, Removal and Installation). Disconnect the electrical connector, release the tabs and remove the ANC microphone. Installation To install, reverse the removal procedure...
Categories
- Manuals Home
- Lincoln Aviator Owners Manual
- Lincoln Aviator Service Manual
- Changing the Front Wiper Blades - Vehicles With: Heated Wiper Blades
- USB Port and Power Point Locations
- Drive Modes
- New on site
- Most important about car
Child Seats

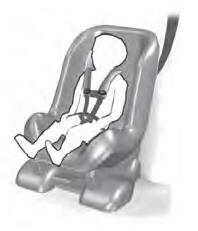
Use a child restraint (sometimes called an infant carrier, convertible seat, or toddler seat) for infants, toddlers and children weighing 40 lb (18 kg) or less (generally four-years-old or younger).
Using Lap and Shoulder Belts
WARNING: Do not place a rearward facing child restraint in front of an active airbag. Failure to follow this instruction could result in personal injury or death.
Copyright © 2026 www.liaviator2.com

